ZB's Vegan Recipes

Here's where you can find some fun, tasty and generally pretty easy-to-make vegan (and often low GI) recipes. Enjoy!

Friday, December 22, 2006

Lentil Pate

I used to love pate – just the deep flavour, and the great mouthfeel of crunchy little toasties and smooth pate. I kept reading lentil pate recipes (though I cannot find any of those damn recipes in any of my cookbooks now!!) and thinking that I really should give that a bash one of these days. I had a fantastic lentil pate at a vegetarian café in the Blue Mountains (Niche Nosh is its name, if you’re interested in going the next time you’re in Katoomba!), and again determined that this was something I wanted to be able to eat on a regular basis.
So here’s my version – it’s best eaten the next day, after the flavours have been given a chance to meld and deepen.

Lentil Pate


Ingredients

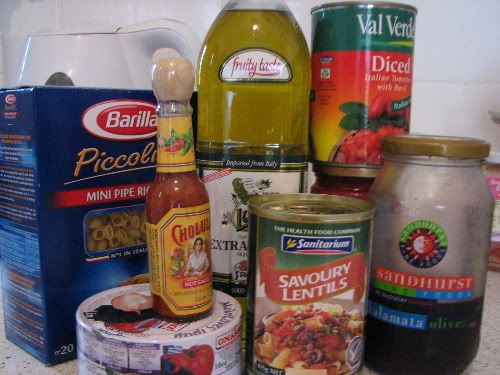
2 x 400g cans of brown lentils (it’s very important to use brown lentils, as they provide the best flavour and texture), drained
1 large onion, chopped finely
Garlic, minced (to taste, and optional)
Fresh herbs – you can use any combination you wish as long as it contains parsley. I find the best earthy flavours come from a mix of tarragon, sage and parsley.
Peppercorns

Vinegar – red wine or cider, but not balsamic

Nutritional yeast

Seasoning salt (optional)

Olive oil

Flaxseed (linseed) oil (optional)


Method


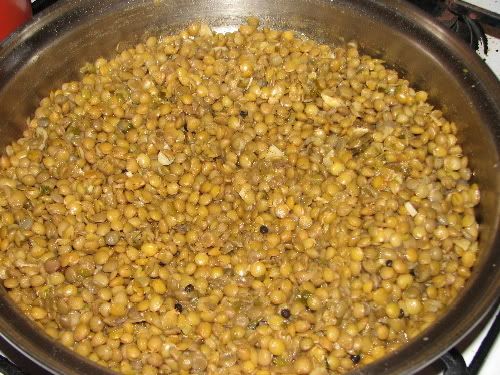
Heat a splash of olive oil in a frying pan over a medium high heat. Add the onion and cook, stirring frequently, for about 2 minutes. The best flavour comes from a well cooked and almost caramelized onion, so you’ll be doing this for a while!! Deglaze the frying pan with a splash of vinegar, and stir the onion around until the liquid cooks off. Add the peppercorns – I generally use at least two to three teaspoons of peppercorns – and another splash of vinegar. Stir the onion and peppercorns around until the liquid cooks off. Add the garlic at this point (if using), and another little splash of vinegar, and stir everything until the liquid cooks off. Pour in the drained lentils, and deglaze with a little more vinegar. Stir to mix everything thoroughly, and cook until the liquid has cooked off again. Turn off the heat, and set aside the mix to cool.

Roughly chop the herbs – I like to use a fair amount of herbs: a handful of tarragon and sage, and about double that of parsley.


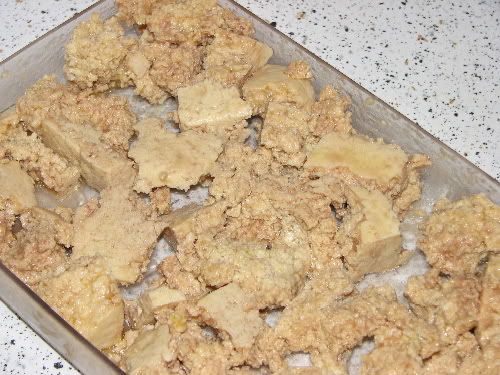
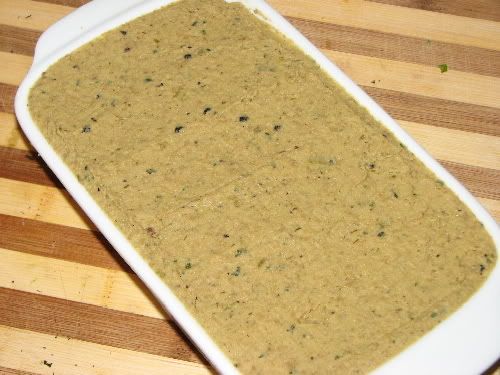
When the lentils have cooled, pour them into a food processor. Pulse for a minute to combine, and then drop in the fresh herbs. Process until the mixture has become a paste. Add about 1 ½ tablespoons of nutritional yeast, and a little splash of vinegar if the mix is too dry. It should be a firm yet moist paste.


From this point onwards, it’s really all about tasting and adjusting the seasoning (nutritional yeast/vinegar/pepper/salt) to your own tastes. Remember that, when left overnight, the flavours will meld more, and the vinegar especially will come forward in the taste.


When the seasoning is done to your satisfaction, drizzle in a little flaxseed oil – this adds a beautiful creamy aftertaste to the pate. This is an optional step.


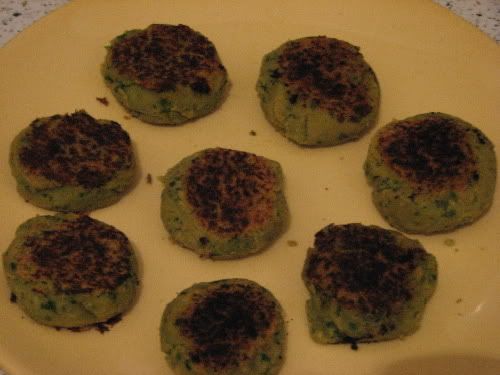
Spoon the mixture into a container to cool – if you want to get all fancy pants, line the container with plastic wrap (enough to wrap over the top again), and drop in some whole peppercorns and herbs in a pretty pattern. Spread the mixture on top of the peppercorns and herbs, and bring the edges of the plastic wrap up to cover the top of the pate.


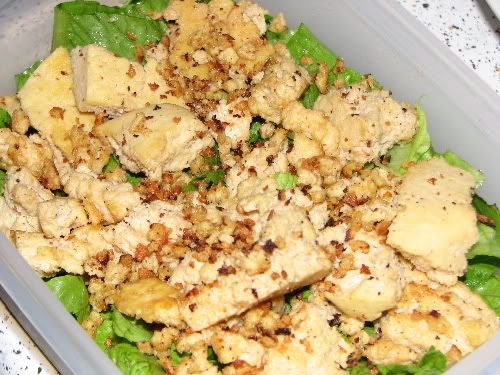
Leave to cool, and either turn out the pate onto another plate (if going the fancy pants route), or leave in the container. Serve with little toasties and optional Nuttelex.
Share and enjoy!

Thursday, December 21, 2006

Mmmmmmmango Raita/Salsa

I like to have a different flavour with my meal – something to complement it, and often to refresh the palate.

I love raitas – the side dishes for Indian meals. I love banana in coconut, I used to love cucumber in yoghurt, I love tomato and onion…I also adore mango chutney and lime pickle.

I’ve always loved fruit salsas – the orange fleshy fruits, such as rockmelon and papaya, seem to be best for salsas. The combination of sweet fruit and tart vinegar and hot chilli is so brilliant.

So, this raita is a salsa is a savoury fruit salad – whatever you call it, it tastes amazing. The tenderness and sweetness of the mango went amazingly well with the I Can’t Believe It’s Not Butter Chicken and Basmati Rice Pilaf.

Fresh Mango Raita/Salsa

Ingredients

1 ripe mango
Spring onion, sliced
1 fresh or dried red chilli, deseeded and sliced
1 tablespoon red wine vinegar
2 tablespoons lemon juice
Olive oil

Method

Cut the cheeks of the mango off, and score slices into the flesh. Pop it inside out and cut the mango flesh from the skin. Cut the sides of the mango off the stone and remove the flesh from the skin. Put the mango slices into a bowl. Toss the sliced spring onion and chilli into the bowl and stir with the mango. Mix the vinegar, lemon juice and a tiny splash of olive oil together and pour over the mango. Stir through.

Leave for at least half an hour, stirring occasionally, to let the flavours meld.


Basmati Rice Pilaf

I'm not really sure that is technically a pilaf, but whatever it is, it's damn tasty!! It's great served with Indian style curries, but can be adapted to have other cuisine's flavours - like lime leaves and chilli for Thai cuisine, or turmeric and peas and onion for Indonesian cuisine...experimenting with the flavours, and adapting them to different cuisines is a lot of fun!

Basmati Rice Pilaf

Ingredients

2 cups basmati rice
2 - 3 cups vegetable stock
1 x 400g can chickpeas
1 cinnamon stick, broken into pieces
2 to 3 star anise, broken into pieces
6 cardamom pods, lightly crushed to release flavour
minced garlic to taste
chopped onion to taste
olive oil

Method

Heat the olive oil in a saucepan over medium heat. Add the garlic and onion, and cook until translucent. Add the spices and stir quickly until fragrant. Add the chickpeas and coat with the spices.

Finally, pour in the rice, and mix it thoroughly with the chickpeas and spices. Pour in the stock to cover to your first knuckle above the rice - about 1 and a half centimetres. I generally just rest the top of my middle finger on the top of the rice, and the liquid should only come up to my first knuckle for the rice to cook nicely.

Cover the saucepan and bring to the boil. When it has reached the boil, stir, turn the heat to low, and cover again. Simmer (stirring occasionally) until all of the liquid has been absorbed.

I Can't Believe It's Not Butter Chicken

There are a few foodstuffs that I miss now that I've been vegan for a while. Haloumi is definitely one of those foodstuffs, and creamy mild tasty Indian gravies are another.

I've been yearning for a butter chicken-esque (though probably more accurately, I've been yearning for the tomatoey creamy gravy, rather than the chicken) experience quite a bit recently, and was surprised to find a recipe on (yes, I spend a lot of time there!) vegweb.

So, being me, I adapted it slightly. I also made some seriously nice side dishes of rice pilaf and fresh mango raita, and it was a great and tasty food experience!!

I'm going to split those recipes out over a few posts, as I think that's a bit easier to find!!

I Can't Believe It's Not Butter Chicken

Thanks to K2, who posted the original recipe on vegweb.

Ingredients

3 tablespoons of Nuttelex
1 onion, finely chopped
1/4 teaspoon cinnamon
4 cloves of minced garlic
2 teaspoons fresh minced ginger
1/4 teaspoon garam masala
1 teaspoon chilli powder
1 teaspoon ground coriander
1/2 teaspoon ground turmeric
1/4 cup tahini
1 x 400g can diced tomatoes
1 tablespoon of tomato paste
1/3 cup Tofutti Sour Supreme
Your preferred amount of either Not!Chicken (I get some great stuff from Vegan's Choice) or extra firm tofu, frozen, defrosted and pressed, torn into chunks. I prefer using the tofu, because sometimes the chicken flavour can overpower the delicate flavours of the gravy
1/2 cup water


Method

Heat a large deep frying pan and melt the Nuttelex until it is liquid. Throw in the onions and the cinnamon to the pan and fry lightly. When the onions are soft stir in the garlic. Now it's spice time!! Cooking the spices like this releases their flavours, and also reduces the powdery taste/feel you can sometimes get in the final product. So, add the ginger, garam masala, turmeric, chili and coriander, and sauté until it's all amalgamated and smells insanely good.

Add the chicken or tofu, and stir constantly to coat with the spice mix. Pour in the tahini and tomato paste, mix through thoroughly. Add the tomatoes and 1/2 cup of water, and make sure everything is well combined.

Cover and simmer for about 20 to 30 minutes - you may need to add some more water as it cooks down. The resulting sauce should be nice and thick. Take it off the heat, and stir through the sour cream, which will lighten the sauce's colour and flavour. You can also use soy milk here, but you do need some sort of creaminess right at the end.

Serve with basmati rice (the pilaf recipe in the next post is a great accompaniment!!).


Lebanese Feast of Feasty Goodness - Lemon Garlic Potatoes

'kay, this is my favourite thing that was ever a favourite thing. It combines two of my favoured flavours - lemon and garlic - with the most versatile vegetable ever, potato.

I used to actually make this as a mash, instead of leaving the potato chunks as is. It's great as a mash, with maybe some parsley through it, and a side of steamed veges. But, frankly, I love the taste of this dish anyhow, anywhere, anywhen...It's a pity that I have to restrict my intake of potatoes due to the fact that they are ridiculously high GI, but as I said in the first Feast post - if you can combine the constituents of your meal to make it medium GI every once in a while, and don't feel like you're depriving yourself, it's so much easier to stick to the low GI diet.

At least, that's my excuse for eating potatoes occasionally!!

Anyhoo, here's my incredibly simple recipe for:

Lemon Garlic Potatoes

Ingredients

about 6 medium sized good boiling potatoes, cut into chunks
about 8 garlic cloves
juice of two lemons
strips of zest of one lemon
olive oil

Method

Place potatoes into a saucepan of cold salted water, with 4 of the garlic cloves, and the strips of lemon zest. Bring to the boil, and cook until tender. Drain, and keep the garlic cloves and lemon zest with the potatoes.

Roughly chop the remaining (unboiled) four cloves of garlic.

In the same pot, quickly heat about 1/3 cup olive oil. Add the roughly chopped garlic and toss quickly until fragrant. Pour in the lemon juice, and combine to make a cloudy mixture. Take off the heat.

Put the potatoes/garlic/lemon zest into a heatproof bowl, and pour in the olive oil/garlic/lemon juice mixture. Stir the potatoes carefully to ensure that the sauce is coating all of them. Set aside to cool a little, and stir regularly before stirring - this will spread the flavour throughout the whole dish.

This dish can be served hot, room temperature or cold. As no seasoning (apart from the salt in the boiling water) has been used, you shouldn't have to season if you serve it cold.

Lebanese Feast of Feasty Goodness - Broad Beans in Rich Tomato Sauce

I've never eaten broad beans before - or if I have, I haven't known that they were broad beans (if you know what I bean)...I'd bought some frozen, and decided to use them in this recipe as a) that's relatively authentic and b)I wanted to use them in something!!

I'm also not overfond of bog standard beans - string beans - though I'm training myself into enjoying them. I have, however, always loved the garlicky bean tomatoey goodness that I got at lebanese restaurants, and have never been able to replicate successfully at home.

However, with some advice and help from ThePenguin (the advice? Pour in a whole lot of olive oil in the middle of the cooking process. It does actually do the job, I have to say....), I made this dish and was well chuffed with it!

Broad Beans in Rich Tomato Sauce

Ingredients

2 cups broad beans or string beans that have been topped and tailed
2 x 400g cans of tomatoes
1 tablespoon tomato paste
a whole lot of minced garlic (I used about 4 cloves)
olive oil
seasoning salt
pepper

Method

Heat a splash of olive oil in a frying pan over medium heat. Add the garlic, and saute until the garlic is fragrant - do not let it burn. Add the beans and toss to cover with the garlic. Add the tomato paste and cook it a little, coating the beans as well. Pour in both the cans of tomatoes, and stir to mix thoroughly. Season to taste, and pour in at least another 2 tablespoons of olive oil. Turn the heat to medium low, and allow to simmer until the sauce is thick and rich, and the liquid has cooked off.

You can serve this wonderful dish hot, cold or at room temperature. If you serve it cold, you may need to adjust the seasoning.

Wednesday, December 20, 2006

Lebanese Feast of Feasty Goodness - Tabbouleh

I love tabbouleh (or however you choose to spell it...). I love the freshness of the parsley and mint, and the nuttiness of the burghul, and the sweetness of the tomatoes, and the bite of the spring onions.

I hate commercially produced tabbouleh. I generally find it dry and bland and throat-sticky. And so I keep forgetting quite how much I dig it, and I forget that making it yourself is simple and produces a far superior eating experience.

It's summer (in Australia, anyway...), lots of salads are in order: get cracking on this delicious and filling and healthy tabbouleh!!

Tabbouleh

Ingredients

A crapload of flat leaf parsley (I used about two large bunches), chopped - not too fine, but not really coarsely
Half the above amount of mint, chopped - not too fine, but not really coarsely
1 cup of dry burghul (cracked wheat)
1 cup of boiling water
about 1/3 to 1/2 cup chopped spring onions
1 cup chopped tomatoes
lemon juice
olive oil

Method

Put the burghul into a bowl, and pour in the boiling water, and a tiny splash of olive oil. Set aside - the burghul will absorb the water, and become soft and chewy. Toss with a fork, and allow to cool.

Put the parsley, mint, spring onions, tomatoes and burghul into a bowl, and mix thorougly. Just before serving, pour lemon juice to taste over the salad to dress it.

Lebanese Feast of Feasty Goodness - Choisters

Choisters (as I said in my previous post) are the new name for the very very soft falafels I made recently for TheBoss and ThePenguin.

This was the first time that I had made falafels from scratch (ie not from a falafel mix), so I'd like to share with you my discoveries along the way!!

I really liked the very simple and robust flavour of these falafels, but I really should have heeded the advice of various recipe sites out there - if you want to have falafels that will survive the frying process, use dried chickpeas.

I used tinned chickpeas, and there was an unfortunate moment of watching my first ever made-from-scratch falafel literally melting away in the oil - the falafel started the size of the bottom of a glass, and ended up the size of a five cent piece. Really really disappointing.

Thankfully, TheBoss stepped up and saved the day, dry frying the now re-christened "Choisters", and providing the centrepiece to our meal. Thank you, Boss!!!

So, you can either go with the tinned chickpeas, and prepare for gentle dry frying, where you only turn the choister once, or go with the dried/soaked/drained chickpeas, and be able to shallow or deep fry the choisters without them melting away.

I'm not sure if baking the choisters would alleviate any of these issues, but that is of course the healthier option...

So. After that preamble, the recipe is fairly simple.


Choisters (Very Soft Falafels)

Ingredients

1 x 440g can chickpeas (if you want the true choister effect) OR 1 3/4 cup dried chickpeas, soaked overnight, and drained
roughly chopped onion/shallot/scallion - this depends on taste, I used about 1/3 cup
roughly chopped garlic - I used 3 or 4 cloves
1/4 cup chopped fresh parsley (or to taste - more parsley/more coriander/less of both)
1/4 cup chopped fresh coriander (or to taste - more parsley/more coriander/less of both)
3/4 to 1 teaspoon cumin
1 teaspoon seasoning salt (I use Herbamare)
1/2 teaspoon ground chilli
canola oil (olive oil is nice, but burns too easily and flavours what it fries too strongly)

Method

Another recipe requiring a good food processor. Put the chickpeas into the food processor, and grind until broken down. Add the onion, garlic, fresh herbs, spices and salt, and process (remember to stop and scrape down the sides occasionally!) until a rough paste is formed.

Put aside to cool for a while, and then form into patties (I like a slightly flattened ball effect).

If you have the soft choisters, heat a little canola oil in a frying pan over a medium heat, and then pour off the excess oil. You need to essentially dry fry these choisters. Place as many choisters as you can handle into the frying pan, and resist any temptation to move or touch them. They can only be flipped once!

Once you have confirmed that they have browned on the bottom, carefully flip them all, and allow to brown on the other side. Remove from the frying pan and put onto paper towel to drain.

Repeat until all of your choisters are done.

If you've got the stronger falafel mixture, heat lots of canola oil in a deep heavy bottomed saucepan, over a medium high heat.

Drop a little of the mixture into the oil to check if it's ready - if the mixture immediately rises to the top, and starts cooking with air bubbles around it, you're good to go.

Carefully place the falafels into the hot oil (it's good to have either tongs or a metal slotted spoon to do this - it minimises the splashing of hot oil around), and cook until brown and crispy. Remove from the oil and place on paper towels to drain.

Repeat for all of your falafels.

You can also shallow fry the falafels, using a frying pan and less oil.

Lebanese Feast of Feasty Goodness - Hommous

I actually am going to go completely out of my self imposed "order" (ie I post recipes in the vague order in which I have consumed the food) as a couple of the upcoming recipes are new ones which I have scrawled down on paper and can't find.

Instead, I will present the awesome feast of lebanese goodness and ginormous proportions wot I whipped up for (and with the excellent help of) TheBoss and ThePenguin (yes, I'm not very good with nicknames, but they know who they are ;-) ...)

So, this feast was way simple, a little time consuming, predominantly low GI and tasty as a tasty thing.

We had hommous, choisters (these were my very soft falafels, which have been renamed choisters by TheBoss and ThePenguin as they are made of chickpeas but have the consistency of oysters...), tabbouleh, broad beans in tomato sauce and lemon garlic potatoes (which is the not at all low GI section of the meal, but I tend to think that food combining is really important - make yourself a medium GI meal, and satisfy those insane potato cravings!!! At least, that's my excuse...)

So, this will be several posts. Yay!!

Let's get to it, eh? Dips first.

Hommous

Ingredients

1 x 440g tin of chickpeas (you can use dried/soaked/cooked chickpeas for this, but if you want easy and fast, go with tinned)
garlic to taste (I like lots and lots - about 3 to 5 cloves)
lemon juice to taste (again, I like lots and lots - generally 1 to 2 lemon's worth of juice)
about 3/4 cup tahini - it depends upon how sesame seed-y you want your hommous to taste
ground cumin - about 1 and a half teaspoons
ground coriander - about 1 teaspoon
a little water

Method

I don't know how the ancient peoples of the Mediteranean made this, but I think you absolutely need to have a good food processor for this recipe. You could use a mortar and pestle, but I can't recommend getting a food processor enough - it has changed my cooking life!! Quick - there's still some shopping days until Xmas!! Ask your loved ones to band together and purchase you a good quality food processor, and then cook amazing foods for them!!

Where was I? Sorry, caffeine rush.

So, roughly chop your garlic, and drop it into the food processor with the drained chickpeas. Grind until everything has starting breaking down. Add the tahini and process for a while longer, stopping occasionally to scrape down the sides of the mixter - the tahini will actually cause the mixture to become quite stiff. Slowly add the spices and the lemon juice - this acid should help smooth out the mixture. If you're not happy with the consistency (I tend to make quite a thick hommous) add a little water and/or more lemon juice until you reach your desired consistency.

Alternative (additional!) - Baba Ganoush

Instead of the chickpeas, roast one large eggplant in the oven until it is soft and all wrinkly. Let cool, and then scrape the flesh into the food processor with the garlic - you can use the skin if you want, but it may make the dip a little bitter and gritty. Proceed with the rest of the steps as above - you shouldn't encounter the mixture becoming too stiff, though, as this appears to be a reaction between the chickpeas and the tahini.

Cover your hommous/baba ganoush and let cool for a while. To serve, smear thickly onto a flat plate, drizzle with olive oil and sprinkle over some red paprika. If you want to really go to town (as I was encouraged to do by TheBoss), decorate further with some hot pickled chillies (I use fefforoni) and kalamata olives.

Thursday, December 14, 2006

From the cupboard to your plate - number 2

So this is another hearty pasta sauce, made for eating during unhappy moments or cold rainy nights (or, if you're life isn't doing well, both, because they're happening at the same time!)

I learnt this recipe from an old, old friend of mine - she also taught me the joys of Nutmeat burgers! Of course, being me, I have to fancy the whole thing up, just to make life difficult for everyone. But it's still a quick, tasty, filling, protein-heavy and fairly healthy meal. The eggplant is not a necessary part of this recipe - I just love the smoky flavour that it imparts to the sauce. The sauce is equally lovely without the eggplant!

You'll probably notice that I have a standard pasta sauce base. And you'd be right. Tomato based pasta sauces are never really going to be that different - it's just what additions you have!!

Lentil Pasta Sauce (now with roast eggplant!)

Ingredients

1 x 415g can of Sanitarium Savoury Lentils
1 x 400g can of crushed tomatoes with herbs (I tend to get the basil flavoured tomatoes for this recipe)
minced garlic, to taste
1 tablespoon tomato paste
can of roasted marinated eggplant (or fresh roasted marinated eggplant, though that wouldn't smoosh as much - it needs to be very very soft)
hot sauce (or ground pepper) to taste
(there's olive oil in the photo, but I didn't end up using it - there was so much oil in the eggplant that I simply left it at that)

Method

Heat a frying pan over a medium heat. Put the soft, oily, marinated eggplant into the frying pan, and saute - and smoosh into a fairly paste like consistency. The eggplant is going to add a great smoky flavour to the pasta sauce, but with no chunks (if, however, you want chunks of eggplant, not so much with the smooshing at this stage).

Add the garlic, and saute in the eggplant smoosh. Add the tomato paste, and mix into the eggplant thoroughly. Pour in the lentils and tomatoes, and and about half a tin of water, and stir through thoroughly. Splash in the hot sauce (or grind in the pepper) at this point. Turn the heat down to low, and leave to cook, stirring occasionally, until the sauce reaches Vesuvius bubbling, and the liquid has cooked off.

Put a pot of salted water on to boil, and cook pasta according to instructions. I love to use the "mini" shapes from San Remo - it adds to that whole childhood/comfort food feel of the meal for me. Any pasta is fine, though spaghetti or fettucine may not grip the sauce as well as shapes do.

When the pasta is cooked, drain well. Stir the pasta through the pasta sauce, coating the pasta thoroughly. Turn off the heat, and fill your plate with fabulously tasty pasta.

Share (if you're lucky enough to have someone around to share with! And even if you're not - share with yourself!) and enjoy!

Monday, December 11, 2006

Mmmmm pasta salad...

I love pasta salad. I love pasta (say hello to those delicious carbs, people!!), and I love mixing up the different ways that I can serve it.

Now, I'm not over-fond of creamy/mayonnaise-y pasta salads. I prefer oil and vinegar dressed pasta salads. And I usually serve my pasta salad warm, though (as I confirmed again today at lunch with my leftovers!) it does taste great served cold.

You can use any sort of pasta you like for this, but I like to use spirals or penne. This gives an idea of the size of the rest of the ingredients, and the ridges in the penne/spiral grasp the dressing really well.

The following is my standard base for pasta salad - I like to add seasonal green things, such as sliced avocado, torn rocket, basil or baby spinach, just before serving.

And sometimes, as in this case, I'll add a "protein" side to the dish. You don't really need it, as the pasta salad is very filling, but if it's cold, or you haven't had your protein intake for the day, it can be a good idea.

Standard Pasta Salad (with side o' soss)

Ingredients


Pasta Salad


about 150g dry Pasta (spirals or penne)
Garlic to taste, thinly sliced
Shallots to taste, thinly sliced
about a cup of mushrooms, cut into sixths (an old boyfriend of mine, a chef, taught me a great style of chopping mushrooms. I love doing it, because it looks all fancy pants. I'll post the actual style in a separate post)
about a cup of baby tomatoes, sliced into sixths
about 1/2 a cup of sundried tomatoes, sliced fairly thinly
about 1/2 to 3/4 cup pitted kalamata olives, sliced in half
Exciting green things (as explained above) - in this instance I had a bunch of fresh asparagus, cut into lengths matching the pasta. If using leafy green things, about a cup to a cup and a half. If using avocado, as much as you like, and can afford, sliced.
Olive oil (to taste)
Red Wine or Balsamic vinegar (to taste)

Marinated Soss

1 packet Australian Eatwell Tomato, Onion and Basil vegetarian sausages, sliced thickly (I like to cut them on the diagonal)
about 1 heaped tablespoon of spicy salsa or tomato relish
about 1 tablespoon of tomato paste
about 1/2 to 1 tablespoon olive oil
about 1/2 to 1 tablespoon lemon juice
about 2 teaspoons of fresh herbs

Method

Marinated Soss

Preheat the oven to about 160 degrees celcius.

Combine everything bar the sausages, and stir well.

Pour over the sausages, and toss to cover. Pour into a lightly greased baking dish, and bake until cooked through and browning.

Pasta Salad

Put a big pot of salted water on to boil. When boiling, cook the pasta.

Drain the pasta, and put the pot back onto a low to medium heat (the pot will still be quite hot from cooking the pasta). Pour in a dash of olive oil, and throw in the garlic and shallots. Stir quickly, and add the sun dried tomatoes. You don't want to brown the garlic and shallots, so if the oil is getting too hot, turn down the heat.

Thrown in the mushrooms (they'll soak up some of the now-excitingly-flavoured oil) and olives. Stir quickly, and then throw in the fresh tomatoes. If using asparagus, pop it in at this point, and toss around quickly. Pour the pasta back into the pot, and toss so that the pasta is well mixed with the veges. Turn off the heat, and pour in olive oil and vinegar to taste (this dresses the salad), and stir well.

If using rocket/basil/spinach or avocado, throw in at this point, and stir through gently and well. The heat from the pasta should wilt the green leaves gently, and the avocado will break apart a little to coat the pasta, and add creaminess to the salad.

Serve with a side of the marinated soss, and share and enjoy!

Wednesday, December 06, 2006

Pink Ravioli!!

I came up with this recipe when I wanted to make spinach ravioli, and had not enough spinach, but also had some beetroot with greens attached. I initially used a mix of spinach and the beet greens, but have moved towards not using spinach at all, and using all of the beetroot and beetroot greens. Of course, if you only have the beetroot itself, you could use a mix of beetroot and spinach.

This can also be used as a filling for cannelloni - I love making cannelloni, it's such a great change from lasagne, but has that same rich feeling to it.

Pink Ravioli

Ravioli Ingredients

2 to 3 medium beetroots, with greens
about 125 to 175g of extra firm tofu, frozen, thawed and pressed OR
250g silken tofu
1 to 2 teaspoons of cumin seeds (don't use cumin powder here - it's important to have the aniseed taste of the cumin burst every now and then, rather than all through the mixture)
about 1/3 cup nutritional yeast
about 1 tablespoon lemon juice
about 1 tablespoon vinegar
about 2 tablespoons of olive oil, plus another dash for cooking
garlic to taste, minced
shallots or onion to taste, minced (I prefer using shallots, to get the extra green bits!)

won ton wrappers (you can get these at most supermarkets - most of these are just flour and water, but make sure to check the ingredients list!)

Sauce Ingredients

garlic to taste, minced
chilli to taste, minced
2 x 400g cans of tomatoes
1 stock cube (I use Millel stock cubes - all vegetarian)
fresh or dried Italian herbs to taste
olive oil

Method

Sauce

This is a really simple sauce - nice spicy, slightly sweet flavour, that complements the sweetness of the beetroot and slight spiciness of the cumin. So. Heat a frying pan over a medium heat, and splash in some olive oil. Saute the garlic and chilli until fragrant, with the herbs if you're using dried. Add both the cans of tomatoes and about a can of water. Crumble in the stock cube at this point and, if you're using fresh herbs, about half of the herbs.

Leave to bubble on a medium heat - as it thickens and there is less liquid to be cooked off, lower the heat. If using fresh herbs, add the second half to the sauce just before serving.

Ravioli

If using extra firm tofu, chop into 1cm square cubes. Mix the nutritional yeast, olive oil, lemon juice and vinegar, and pour over the tofu. Allow to marinate for at least half an hour.

Put about 3cm of water into a saucepan, and place a steaming basket over it. Wash and peel the beetroot (your fingers and board and knife and workspace will get pink throughout this recipe. It's part of the fun!) Slice into 1 cm thick slices. Put the beetroot into the steaming basket, and steam until tender. You can simply boil the beetroot, but I like to steam it to retain more of the nutrients. If boiling, remember: start from cold (like potatoes) and add a little vinegar to the water to assist in maintaining the brilliant colour of the beetroot.

Wash the beetroot stems and leaves. Chop the stems finely, and roughly chop the leaves. When the beetroot is cooked and cooled, chop into 1cm square cubes.

Heat the dash of olive oil in a saucepan over a medium heat, and saute the onion and garlic until translucent. Add the beetroot stems and toss quickly. Add half of the marinated tofu, and then half of the chopped beetroot. Throw in some cumin seeds until very fragrant - I like lots of cumin in mine, but it is a strong taste, so if you're unsure, put in less. You can also add a little of the herb that you used in the sauce - last time I made this, I used thyme in the sauce, and added a little to the ravioli mix alongside the cumin. It's another great way of blending the flavours. If you're using silken tofu, add it now.

Add the remaining tofu and beetroot (the tofu should be going a light pink by now!), and stir. If the addition of the tofu and beetroot has dampended the smell of the cumin, add some more cumin seeds to the mix.

Take off the heat, and stir through the roughly chopped beetroot leaves. Spread out onto a shallow bowl, and allow to cool.

Now, the fun part!! Making the ravioli!!

I tend to make mine like very simple dumplings. Hold the round won ton wrapper in the palm of your hand. Put about one to two teaspoons of the filling into the centre of the wrapper. Wet the edges of the wrapper with water, and press together. I tend to put ridges in my ravioli edges, but you can just press together and leave them flat.

Another way to do it, if you want to go the fancy pants 4 star restaurant way, is to place one won ton wrapper on a board. Put about a tablespoon of filling into the centre, and wet the edges of the wrapper with water. Get another wrapper, and wet the edges with water. Press the edes of both of the wrappers together, so you end up with a giant round ravioli.

Whichever method you use, they're going to look very pretty!!

When you've finished the ravioli, put about 3cm of water in a saucepan, and cover with a steaming basket. I steam my ravioli, because they fall about every time I try to put them into boiling water!! Steam until the won ton wrappers are clear and you can see the lovely pink beetroot inside.

Serve with the thick rich tomato sauce, and share and enjoy!

Monday, December 04, 2006

Marinated Tofu Salad

I'm trying to up my protein and green leafy vegetables intake, and have found myself trying to make wacky versions of mayonnaise-y chicken/egg/tuna salads with marinated tofu recently.

I've made an insanely successful "Chicken" Caesar Salad, using the great mayonnaise recipe from the Blossoming Lotus' recipe book. The only thing I'd say about that recipe - it's really really rich, so I'd be careful how much you consume!!

When I'm being lazy, though, I don't make so much with the effort. The following recipe involved the least amount of effort for the maximum return of tastiness ;-)

Marinated Tofu "Chicken" Salad

Tofu Marinade Ingredients

extra firm tofu, frozen, thawed, pressed and torn into chunks
about a tablespoon of nutritional yeast
about 1/3 cup lemon juice
about 1/3 cup vinegar
about 2 tablespoons of olive oil
dash of hot sauce (optional)

Creamy Dressing Ingredients

about 1/3 to 1/2 cup of Tofutti Better than Cream Cheese
lemon juice/vinegar to taste
about 1 teaspoon of seeded mustard
3 gherkins, chopped
1/2 to 1 tablespoon capers, minced
1 shallot, chopped (both white and green bits!)

Cos lettuce, torn

Method

Marinated Tofu

Whisk the tofu marinade ingredients together (that's everything bar the tofu). Pour over the tofu chunks, and toss to cover. Let marinade in the fridge, tossing occasionally, for at least 1/2 an hour.

Heat a non stick frying pan over a medium high heat, and throw the tofu in. Cook, stirring fairly vigourously, until the tofu is golden brown. Take off the heat and set to one side to cool.

Creamy Dressing

Whisk the Better than Cream Cheese, the seeded mustard, and the lemon juice/vinegar together - the more acid you add, the thinner the dressing will become. I like my dressing really lemony, but that's not to everyone's taste!! Add the gherkins, shallots and capers to the mix, and stir through until combined.

Pile heaps of shredded cos lettuce into a bowl, top with the marinated tofu chunks and the dressing.

Grab a big glass of water or some citrussy juice to alleviate the creaminess of the dressing, and share and enjoy!!

Saturday, December 02, 2006

What is she talking about?? Part Two

So, applesauce.

I kept reading about applesauce in a lot of recipe books, and whilst I wanted to use it, I really didn't want to buy the damn stuff. Applesauce is one of the fabby vegan baking tricks. It's great as an egg replacement and oil/margarine replacement. Oh, and you can, you know, just eat it 'cos it's really yummy! I like to put a tablespoon on top of my muesli, or nice warm porridge.

To quote from the Garden of Vegan: "Add about 1/4 cup applesauce in place of an egg in sweet baked goods. It's a great binder but you might need to add a little extra baking powder (about 1/2 tsp) to help with the rising."

So I make batches of applesauce and freeze it - great way to use up any older apples you may have kicking about (since I've had restrictions put on the amount of fruit I can eat, I've got heaps of apples I don't get to use up before they start getting a bit old!)

It's incredibly easy - you just need to have some time under your belt. I tend to put this on the stove in the morning on a weekend, whilst I'm doing the weekend houswork. Just check up on it every now and then, give it a stir, and after a couple of hours, you have applesauce!!

Applesauce

Ingredients

Whole bunch o' apples, peeled, cored, and cut into 2cm square dice
Water to cover apples

Method

Bung the apples in a saucepan, and cover with water - they will all float to the surface, so don't go too crazy with the water. There'll probably be a need for more water as the cooking continues.

Put the saucepan on a medium low heat, and leave to bubble away whilst you do important things like consume coffee and do the washing up. Check on the apples regularly, and give them a stir. As they begin to break up, stir more often, as they can begin to stick. Add more water if the mix is getting stuck but the apples are not disintegrated.

When the applesauce reaches this point, take it off the heat. Let cool, and pack into airtight container/s. I like to freeze mine, and defrost as needed for baking/consuming.

Share and Enjoy!!