ZB's Vegan Recipes

Here's where you can find some fun, tasty and generally pretty easy-to-make vegan (and often low GI) recipes. Enjoy!

Monday, March 19, 2007

Excessive success!!

Warning: This post contains a ridiculous number of photos, because a) I am very proud of this recipe, and b) I was having a stupidly good time making it!! (And c) I think it's pretty...)

My sponge experiments continue anon - I believe I may have reached my apex in cake making with this latest experiment, however. Yup, ZB has made a vegan black forest cake...a tasty, low fat, almost sugar free, ridiculously rich and excessive vegan black forest cake!! I tried a couple of new things with this cake, and I'm incredibly happy with it. I also screwed up a couple of things when I was cooking this cake, and it still worked!! Yay!!

I'm really surprised that I haven't found any vegan black forest cake recipes out there - there are variants on the cherry/chocolate theme, but none attempting that pure black forest cake experience (not that I could find, anyway). So this is my first attempt, I'm sure I'll change the recipe over time, but for something that I made up over the last week, I'm pretty insanely happy with it!!

What's even better is that I experimented with two ingredients I had never used before - guar gum for thickening the cashew cream (most of the recipes I found used oil for this, and I wanted to try to keep everything fairly low fat - plus I was worried that you would be able to taste the oil. And, you know, always fun to play with new ingredients!), and stevia for sweetening the cashew cream. Stevia is a natural sweetener, from a plant, and creates no glucose reaction in the body (making it a perfect sweetener for diabetics or folks with insulin resistance), even though it is around 200 times sweeter than sugar!! More information on both guar gum and stevia can be found in the links in the recipe.

So, without further non-recipe and food porn waffling, may I present:

Black Forest Cake

Chocolate Cake

1 heaping cup unbleached plain flour
1 heaping cup unbleached spelt flour
3/4 to 1 cup good quality cocoa powder
1/2 scant cup muscovado sugar
2 teaspoons baking soda
1/4 scant cup maple syrup
1 cup drained cherry liquid
1/2 cup apple sauce
2 tablespoons apple cider vinegar

Cashew Cream

1 heaping cup raw cashews (and water to cover to soak)
1/2 cup water (or as needed)
Pure vanilla extract to taste
1/16 to 1/8 teaspoon stevia
3/4 teaspoon guar or xanthan gum

Chocolate Mousse

1 block (100g) good quality vegan chocolate (I use Lindt 70 or 85% cocoa)
1 package (200g) silken tofu, gently drained
3 tablespoons apple sauce
1/2 cup drained cherry liquid
Stevia or maple syrup to taste (remember, this cake shouldn’t be too sweet, and the chocolate mousse will sit with the cherries and the cream, which will sweeten it)
1/4 teaspoon guar or xanthan gum

Other

Sour (or Morello) cherries - generally sold in bottles (about 1 kilo - I used most of 2 x 680g jars of sour cherries)
Drained cherry liquid

Method

Chocolate Cake

Preheat your oven to 180 to 200 degrees celcius. Grease and flour an 8inch round baking tin.

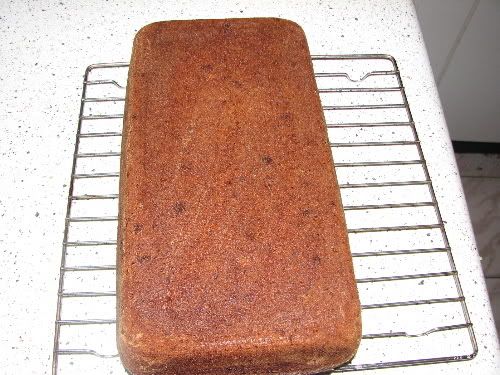
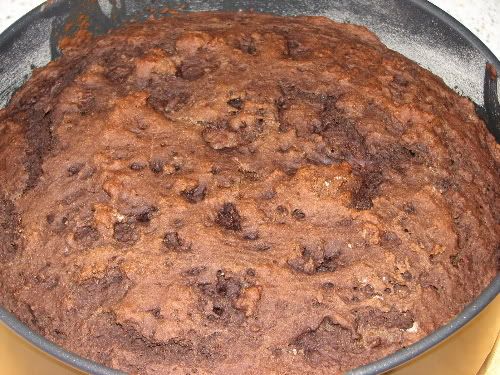
Sift together the dry ingredients – as much as possible!! This really makes for a softer, lighter, more sponge like cake. Mix together the wet ingredients. Carefully pour the wet into the dry, moving the dry around whilst pouring, to ensure even coverage. This mix will foam, so do not overmix, but make sure that everything is mixed together and there are no lumps. Pour the foaming mixture into the baking tin, and put into the oven for at least an hour to an hour and a half, or until a knife put into the centre comes out dry.


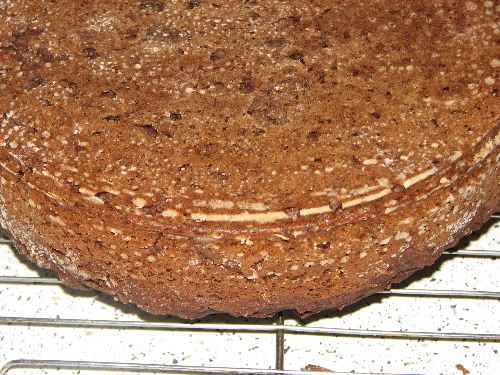
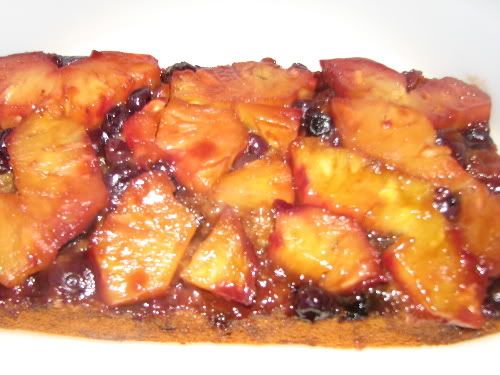
You can see here that the top forms a quite firm crust, though the rest of the cake is light and spongy. I used the top of the cake as the middle layer in the finished cake, so that it got softened and soaked by all the mousse and cream and cherries.

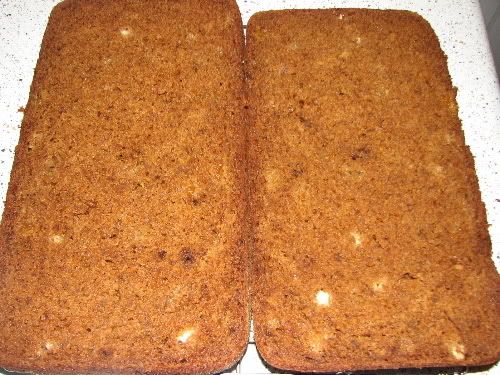
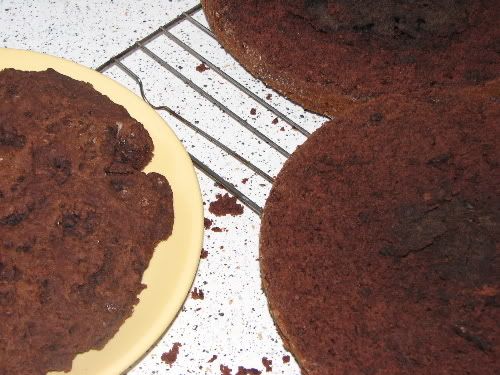
Set the cake aside to cool in the tin for about 10 minutes, then turn it out to cool on a cooling rack. When it has cooled to the touch, slice it into three horizontal equal slices. These will form the layers of the cake.


Pour the remainder of the reserved drained cherry liquid onto the slices, and leave to cool and soak in.

Cashew Cream

Soak the raw cashews for a minimum of six hours, completely covered in water, in the fridge. Drain and rinse the cashews, and place into a food processor. Process the cashews, with water, until they have reached a paste consistency – not too thick, but not too watery either! Keep processing to ensure that all graininess from the nuts is gone. As you are processing (and scraping down the sides occasionally), add the vanilla extract and stevia to taste. I found the stevia a really intense flavour, and I thought that the amount I’d used was too much. However, the intensity of the stevia settles overnight, and I found it was just perfect with the cake!!

After you have flavoured the cream to your liking, start adding the guar or xanthan gum – add a quarter of a teaspoon at a time, and check the consistency after processing each teaspoon. I aimed for a very thick consistency, as I wanted to be able to pipe the cream – but you can stop at your desired consistency, if you’re not going to pipe or decorate the top of the cake with the cream. And remember, it will thicken a little more in the fridge.

Put the cream (covered) in the fridge to chill. Wash the food processor bowl!

Chocolate Mousse

Break up the chocolate into a metal bowl, and create a double boiler by placing the metal bowl above a saucepan which has about a third full of boiling water in it.

Melt the chocolate, and set the metal bowl to one side.

Put the silken tofu and drained cherry liquid into the food processor, and process until broken down and combined. Pour in the melted chocolate, and process until smooth and well combined. Add the applesauce, and process until very creamy and smooth. Taste for sweetness. If sweetening, use the sweetener of choice (about 1/16 teaspoon stevia, or 1 to 2 tablespoons maple syrup), and process until combined.

You can also add about a quarter of a teaspoon of guar gum to the mousse, to assist in it setting and holding in the layers of the cake.

Put the mousse (covered) in the fridge to chill.

Putting it all together

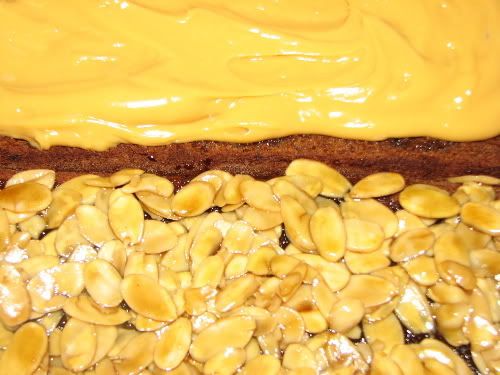
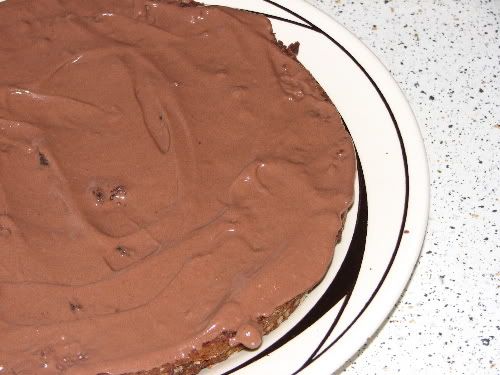
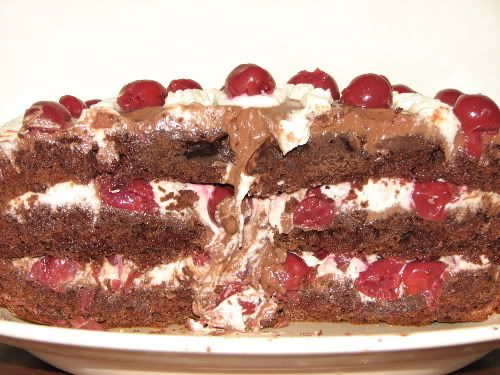
On a plate or cake holder, put the bottom layer slice of cake down. Smear the whole layer liberally (and to the edge) with chocolate mousse.


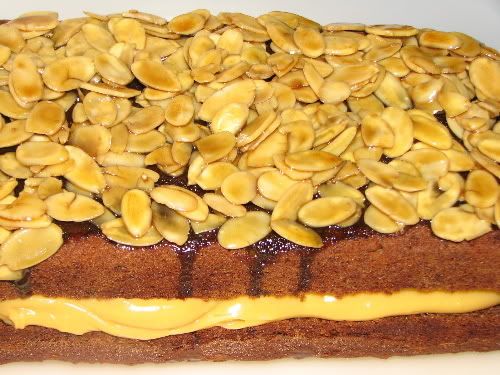
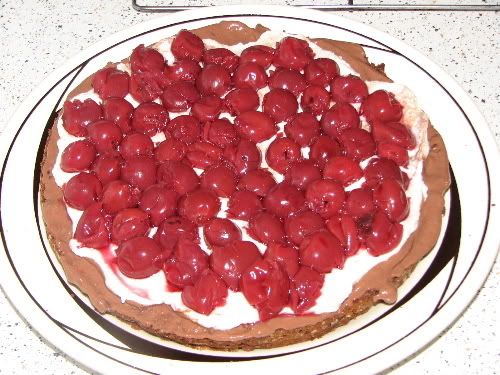
Using a different spatula, smear a layer of cashew cream on top of the chocolate mousse. You will get a little bit of a mix of the two at this point, so use a gentle touch. Cover the cake layer with cherries, up to about a centimetre from the edge all around – the pressure from the top layers will push the cherries out.


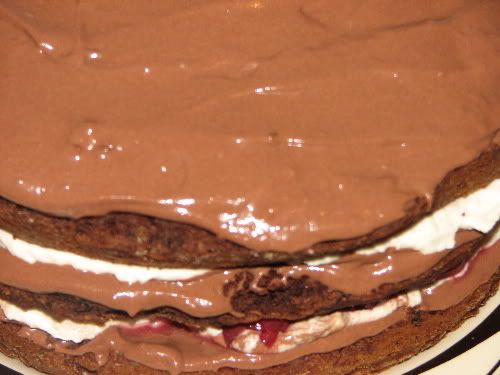
Take the next layer and place it on top of the bottom layer. Repeat the mousse/cream/cherry process. Take the top layer and place it on top of the middle layer.

Smooth chocolate mousse thickly on the top layer – let it drip down the sides! (I like a rustic feel to my cake decorating!!) I recommend piping the cream at this point, because you won’t run the danger of mixing the chocolate and cream.


Pipe the cream in whatever decorative pattern you want to use, and scatter cherries in a pretty pattern between the cream patterns.


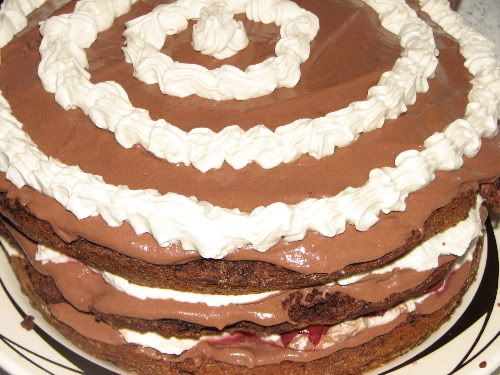
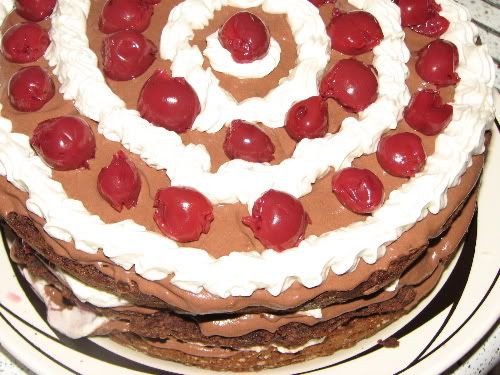
You can top all of this with chocolate curls, but the flavour is great without them, and the presentation is also pretty fabby!!

Let the cake chill overnight – this is very important to allow the flavours to meld, and to get that lovely moist rich black forest cake texture.


Share with good friends, and enjoy to the fullest!!

Tuesday, March 13, 2007

Bienenstich - Bee Sting Cake

So, I'm on a baking kick at the moment. The cake base that I found and adapted for the Pineapple Upside Down Cake is so incredibly versatile - and, touch wood, I haven't screwed it up in the different recipes I've been experimenting with. Which, when it comes to baking, is a damned miracle, frankly.

I was eating the upside down cake with my friend and some time flatmate, Nixygirl, and we were talking about what other sorts of cakes could be made with this awesome vegan sponge base. The first one we discussed was sticky date pudding (which I will be trying tomorrow night, so expect a post!), and then, for some unknown reason, Bee Sting Cake popped into my head.

I can't think of a more un-vegan cake, really. Honey topping and custard filling!! I can't even remember the last time I had Bee Sting...probably, um, ten years ago? Definitely when I was in my voracious cafe lifestyle kick. I'm not even sure I've seen Bee Sting on a cafe menu for that long - if not longer!!

Bee Sting (or Bienenstich) is traditionally a yeast risen cake made with almond meal, topped with (often honey) toffee-d almonds, and with a centre of rich custard (or whipped cream, but I prefer the custard version). The marvellous!! wonderful!! I'm-really-excited-about-this!! vegan sponge has a slightly doughy texture, perfect for this cake.

So I made up a recipe, and then wandered the interwebs to check if I was on the right track. And, pretty much, yeah. Very simple, but snazzy looking and tasty!! Of course, not particularly traditional, and I can't guarentee that it tastes like Bee Sting...but it tastes really good, so who's quibbling?!

A couple of notes - this sponge has been coming out brown all the way through for me. Part of this is because I use an unrefined sugar, and also (I think) because of the reaction between the baking soda and the vinegar. Additionally, cakes made with almond meal often brown fairly quickly. But the dark golden colour really suits the summery feel of the Bee Sting Cake.

ZB's Bee Sting

Ingredients

Cake

1 cup plain flour
1/2 heaping cup spelt flour
1 heaping cup almond meal
2 teaspoons baking soda
200g Nutrisoy Apricot Dessert (I use this to replace oil/fat - and the subtle apricot flavour goes really well with the almond flavour)
2 tablespoons apple cider vinegar (I like using this vinegar as the fruity flavour adds a spiciness to the cake - and no vinegar taste!)
1/2 scant cup muscavado sugar
maple syrup/agave nectar/water to make 1 cup of liquid

Custard

1/2 to 3/4 cup vegan custard powder
juice of one orange
splash of pure vanilla extract
agave nectar to taste
1 to 1 1/2 cups soy milk (about double the amount of custard powder)

Almond Topping

1/2 cup sugar
1 to 2 tablespoons Nuttelex
1/2 to 1 cup soy milk
75g (about 1 cup) slivered almonds

Method

Cake

Heat your oven to about 190 degrees celcius. Grease and flour a cake pan - I used a rectangular pan of about 12 by 4 inches). Sift the flours, almond meal, sugar and baking soda together in a large bowl. I never used to sift the flours for cakes, but I'm now a big fan of it. Sift, I say!! Mix the maple syrup/agave nectar/water and the vinegar together in a separate bowl. Mash the apricot dessert, and stir into the flour mix.

Pour the liquid into the flour mix, and stir to combine. Don't overmix, just enough to get the foaming reaction going, and to get everything well combined and to make sure that there are no lumps.

Pour into your cake pan, and bake for about 45 minutes to an hour - until dark golden brown and risen, and a knife inserted into the centre comes out clean.


Remove from the pan and set aside to cool for about 15 to 20 minutes. Using a serrated knife, carefully slice the cake horizontally, and let both slices cool even further.


Custard

Put a saucepan (with a good solid top, as we're using this as the base for a double boiler) on to boil, filled about a third to half way full with water.

In a metal mixing bowl, whisk the custard powder and soy milk together. Put the bowl over the boiling water in the saucepan, and whisk until thickened and cooked. You want the custard to be quite thick, in order to take the weight of the cake that will be on top of it. Take the bowl off the saucepan, and add the agave nectar, orange juice and vanilla extract to taste, whisking all the while.

I tend to cheat, and cool the custard fast in the freezer. If you do this, take it out and whisk it every 10 to 15 minutes, until the custard has completely cooled and is very thick and smooth. Once it has cooled, test for sweetness - you don't want it too sweet, but you don't want it tasting like custard powder either!!

Almond Toffee

Put the Nuttelex and sugar into a saucepan over a medium heat, and melt, stirring fairly often to make sure the mix doesn't burn. Let it come to the boil for a little while, to get the sugar to start caramelising and thickening. Slowly pour in the soy milk, whisking it into the mix, until the toffee is glossy and still fairly thick. Pour in the almonds, coat thoroughly in the toffee, and set aside to cool slightly.

Putting it all together

Choose which of your cake slices will be the top of the cake. Spoon the majority of the almonds and toffee onto this slice, making sure that the whole top of the cake is covered, and the almonds have enough toffee to stick to each other and the cake when cooled.

Pour the rest of the almond toffee onto the bottom layer of the cake, making sure it's even all over.

Pour the custard onto the bottom layer of the cake, making sure it's heaped highest in the centre of the cake, and only just reaches near the edges. The weight of the top layer will push the custard out a bit, and you don't want it oozing everywhere - just enough to peek out!!


Smooth the custard if needed, and then take the top layer and carefully place it on top. I had to do this a couple of times, because I didn't get it centred well enough, and then I got the top around the wrong way and it looked a little wonky!! I sorted it out in the end, though!

I let this chill overnight before serving it, to let the layers and flavours come together - though I'm sure it would taste awesome served immediately!!


Sit outside in the sun, with good friends and something to celebrate, and enjoy this luscious, rich and wonderfully vegan treat!!

Thursday, March 08, 2007

It's upside down!!

I had half an organic pineapple kicking about, and a friend staying at my place, and felt the need to bake. I'm not a very good baker - my traditional cakes and biscuits are never very good - so there was an odds on chance that it would all go horribly wrong. But, thankfully, whatever higher powers look down upon vegan bakers were smiling upon me that night, and I made a lovely, moist, light, flavoursome...

Pineapple Blueberry Upside Down Cake

I got the original recipe from vegweb.com, posted by baypuppy, which had in fact been adapted from another recipe on vegweb.com, posted by Jeanne, and I adapted a little myself to make it more low GI friendly!! This is why cooking is so much fun!! You can always come up with something slightly different and shaped to your own needs....

Ingredients

1 heaping cup plain flour
1/2 heaping cup spelt flour
1 teaspoon baking soda
1/2 cup fresh juice (I used orange/pineapple)
1/3 cup vanilla soy yoghurt
3 teaspoons apple cider vinegar
1/2 scant cup muscavado sugar
maple syrup, agave nectar and water to make 1/4 cup liquid
another 1/4 cup muscavado sugar
1/2 pineapple, cut into chunks (you could use tinned pineapple as well)
handful frozen blueberries

Method

Heat the oven to 180 degrees celcius.

Line a non stick baking dish (I used a 12 by 4 rectangular dish - should probably have used something slightly smaller) with the pineapple, and fill in any gaps with the blueberries. Sprinkle with the 1/4 cup of sugar.

In a big bowl, mix the plain flour and the spelt flours together with the 1/2 cup sugar and baking soda. In another bowl, mix together all of the liquids bar the yoghurt. Pour the yoghurt into the dry ingredients and mix quickly. Pour the liquid into the dry ingredients, and stir to combine. As you do this, the baking soda and vinegar will react, and the mix with fluff up a lot. Make sure you don't overmix, you just want to combine it thoroughly and get rid of any big lumps. If you overmix, you'll lose the lightness that is being caused by the vinegar/baking soda reaction.

Pour the (probably still expanding!) mix on top of the fruit in your baking dish. Gently smooth down the top and place into the oven. Cook for about 30 to 40 minutes, or until a knife pushed into the centre comes out clean.

Let rest for a little while in the pan, and then put a serving dish over the top and flip your cake out of the pan onto the serving dish.

Serve slices with decadent scoops of soy ice cream.

Awesomely addictive salad...

...Jamie Oliver style!

A friend had bought some fresh figs, and we were trying to figure out if they should go into a fruit platter, or whether we could do something different with them. We came up with the following extremely delicious, simple and addictive salad.

Rocking Fig Salad

Ingredients

2 bunches of fresh rocket, washed well
6 to 10 plump fresh figs
2 to 3 ripe avocados
juice of 1 to 2 lemons
really good fruity olive oil (cold pressed extra virgin olive oil, if you can - it just lifts the flavours out of this world!!)
sea salt to taste
freshly cracked pepper

Method

Get a nice big flat serving platter. Roughly tear your rocket into large-ish bits, and scatter all over the platter. Slice the figs into sixths or quarters (depending on their size), and scatter on top of the rocket. Slice the avocado and scatter on top of the rocket.

Whisk your lemon juice, olive oil, salt and pepper together until silky and thickened slightly, and pour over the salad.

Serve, and remember to have each mouthful contain rocket, fig and avocado for an inspiring taste sensation!!

Tuesday, March 06, 2007

Photoless Phood Post

I've been making some nice stuff recently, but my camera has taken to being a hater of batteries, and so I haven't had any photos to post. But then I thought, bugger it, put up some recipes anyway!!

There are a couple of things that I made of which I am extremely proud:

Portabella mushroom burgers with onion jam and spicy sweet potato chunks
Ridiculously tasty salad Jamie Oliver Stylee
Vegan gyoza

None of which will have accompanying photos, but there you go...


Portabella Mushroom Burgers

Stupidly simple, and awesomely tasty. The ingredients below are to serve two hungry folks.

Ingredients

2 portabella mushrooms
Braggs/soy sauce/tamari to taste
olive oil
salad fixings
flaxseed dressing
buns
onion jam (recipe to follow)
sweet potato chunks (recipe to follow)

Method

Clean, and if you're feeling naughty, peel your mushrooms. Then cover in marinade. The Braggs bottle I have has a spray nozzle, which is perfect for this! But if you don't have spray capabilities, just pour your desired amount of Braggs/soy sauce/tamari into a bowl, and use a pastry brush. Completely coat the mushrooms in Braggs/soy sauce/tamari, and leave to marinate for about an hour, turning occasionally. Preheat your oven to about 150 degrees celcius.

Heat a little olive oil in a frying pan over a fairly hot heat, and sear the mushrooms on both sides until starting to go golden. Put the mushrooms, and any juices in the pan, into a baking dish, and place in the oven for as long as it takes you to make the onion jam and sweet potato chunks!!

Split the buns, smear one side with fresh avocado. Put the cooked mushroom on this side, and smother with onion jam. Put your salad fixings on the other side of the bun, and drizzle over the flaxseed dressing. Serve with sweet potato chunks on the side. Prepare not to move for quite a while after eating!!

Onion Jam

Ingredients

about 4 medium sized onions, thinly sliced into half rings
vinegar (I use organic apple cider vinegar)
olive oil
sweet chilli sauce (optional)
vegan worchestshire sauce (optional)
juices from baking mushrooms

Method

In the same frying pan as above, heat some more olive oil over a medium heat. Put the onions in, and cook until softening and beginning to brown. Splash in some vinegar, and continue to cook until the liquid has evaporated. Splash in some worchestshire sauce (if using), and cook until the liquid has evaporated. Splash in vinegar at least a couple more times, and allow to cook off. You can also throw in a dash of sweet chilli sauce to up the sweetness and spiciness of the jam.

As the onions begin to disintergrate, and resemble chunky marmalade, take the mushrooms out of the oven, and pour any juices from the baking tray into the onions. This way, you don't waste any of the mushroomy goodness, and you get an additional great flavour into the onion jam!!

Once the onions are soft and gooey and shiny, take them off the heat.

Sweet Potato Chunks

These are kinda crispy outside, and soft and squishy inside - pretty much baked sweet potatoes, but with some fun flavouring!!

Ingredients

1 large sweet potato
seasoning salt to taste
1 teaspoon ground chilli or cayenne pepper
1 - 2 teaspoons ground cumin
1 - 2 teaspoons ground coriander
olive oil

Method

Mix the seasoning salt and spices together well.

Chop the sweet potato into 5cm long by 1.5 cm square chunks, and in a baking dish, toss with the seasoning mix - you may not use all of it, so build up to coat the chunks. Drizzle olive oil to coat the chunks (some of the seasoning mix will drip off at this point, but they're getting cooked in it, so...), toss, and put into your preheated oven. Cook for about half an hour, turning occasionally, until crispy on the outside and cooked through.

Enjoy your burger goodness with a friend!! Remember to have a big glass of water or fresh juice with this meal - you will get thirsty!!