ZB's Vegan Recipes

Here's where you can find some fun, tasty and generally pretty easy-to-make vegan (and often low GI) recipes. Enjoy!

Tuesday, January 30, 2007

Mmmmiddle Eastern sweets pt 1

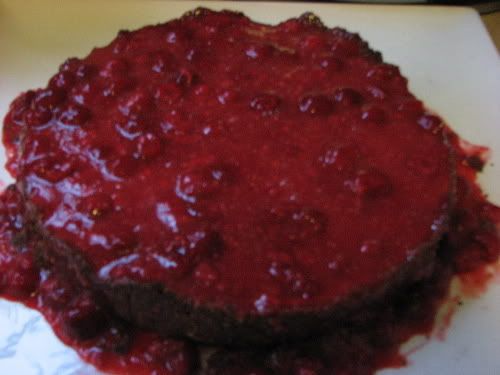
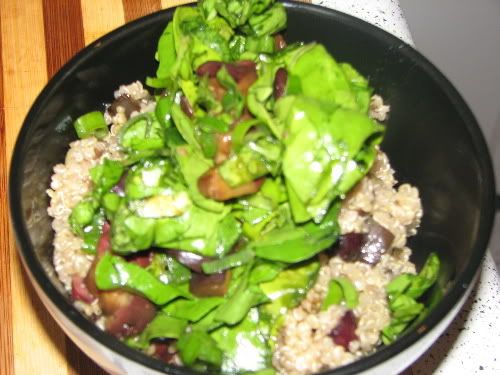
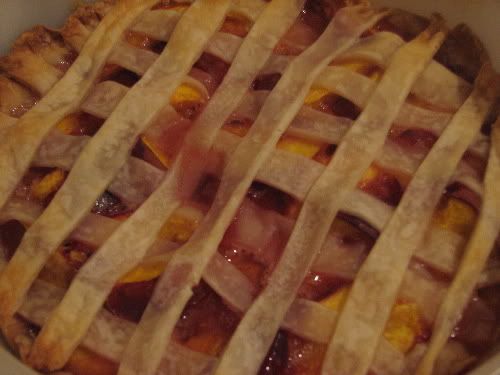
I recently had friends over for another Lebanese feast, which was really an excuse to make some yummy middle eastern sweets - baklava, mamoul and a middle eastern inspired tart. I had a great time doing it, and mamoul have become a default bicky for me to make - easy and very tasty.

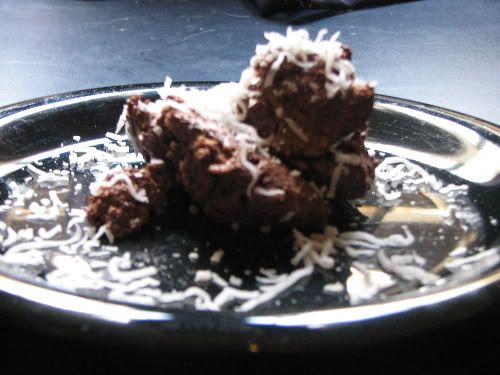
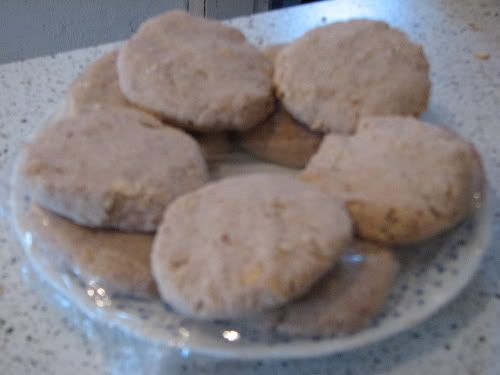
Mamoul are basically a stuffed rosewater flavoured shortbread - you can either stuff them with dates or mixed ground nuts.

I got the original recipe here, and veganized it thusly:

Mamoul with Dates

Ingredients


Dough

2 cups plain flour
1 tablespoon dry sweetener (I used muscovado sugar)
220g Nuttlex
1 tablespoon rosewater
1/4 cup soymilk

Date filling

440g pitted and chopped dates (dried or fresh is fine)
1/2 to 1 cup water

Method

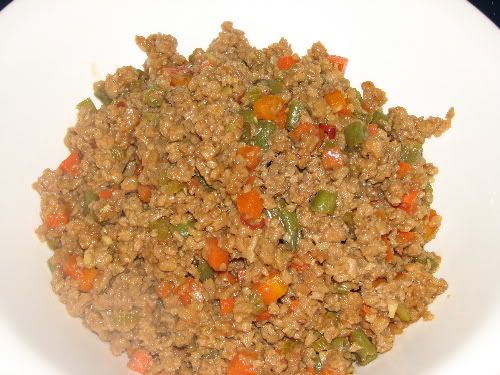
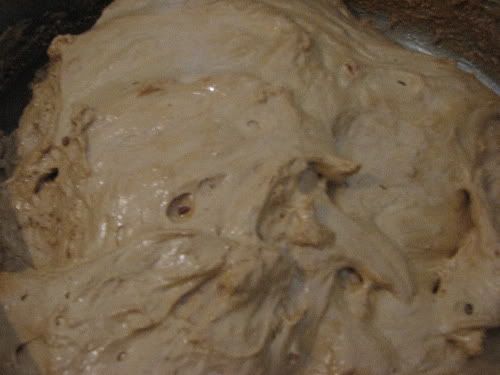
Put the dates and the water (use more water if the dates are dried) into a saucepan, and cook over a low heat until the dates have become mushy and the consistency of a thick paste, and there is no water left. Set aside to cool.

Combine the flour, sugar and Nuttelex together with your fingers, working the Nuttelex into the flour until the flour has a crumbly consistency. Add the rosewater and soymilk, and mix with a knife until completely combined. The mixture will be very sticky, but don't freak out! Turn out onto a lightly floured surface, and knead until the dough is soft and pliable. Cover and set aside for half an hour.

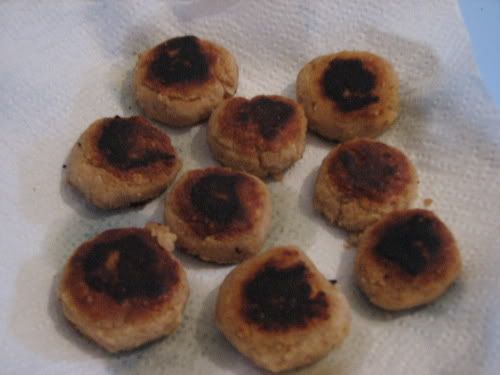
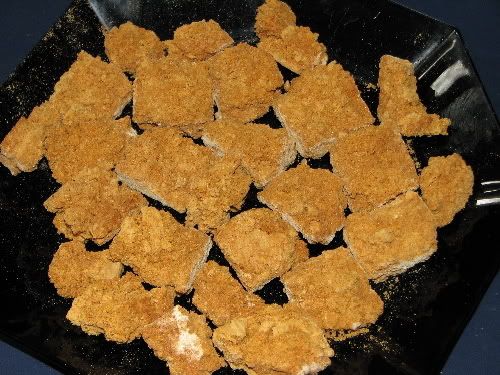
Take about an unshelled walnut sized piece of dough, and roll into a ball. Slowly flatten the dough with your fingers until it is about four centimetres in diameter, and about 1/2 centimetre thick. Place a mound of date mixture in the centre, and bring up the sides of the dough - you may need to gently press down the filling to do so. There are a variety of shapes you can make - press it down to form a smooth ball again, or form into a crescent by pressing the folded edges together with your fingers.


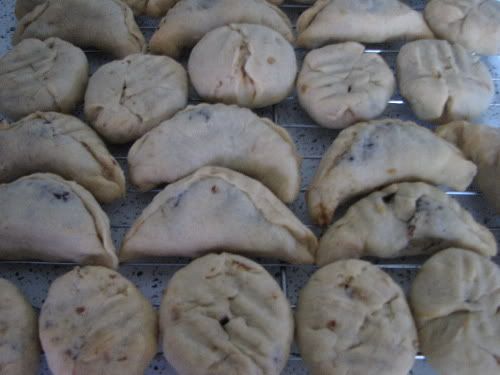
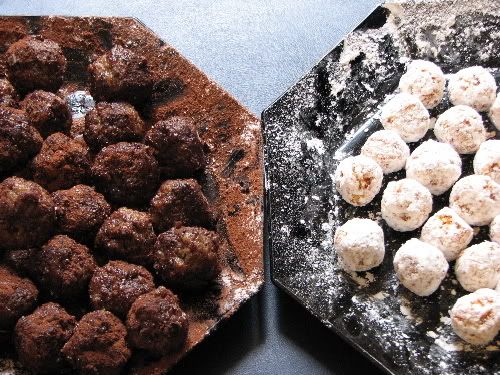
Place the mamoul, smoothest side up, on a greased and floured flat baking tray. Flatten slightly, and if you want, make a pattern on the top with a fork. Put into your preheated oven for about 20 minutes - remove from the oven when firm, but before the mamoul begin to brown.

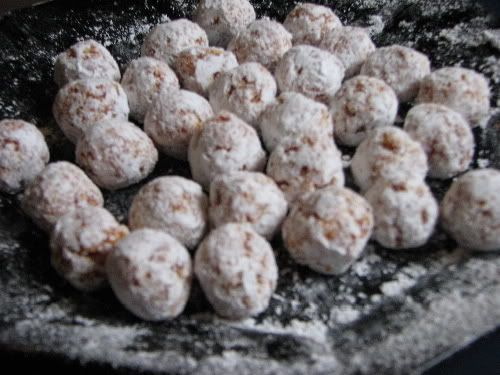
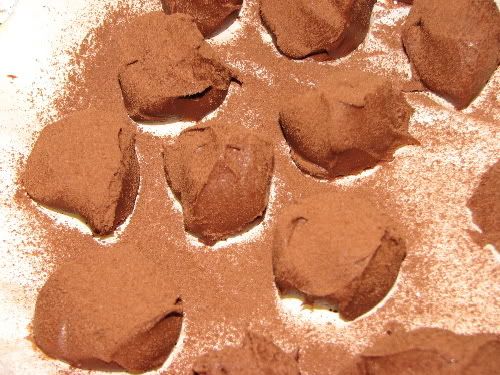
Cool completely and serve. You can dust them in icing sugar, but I like them without it!!


Mamoul with Nuts

The nut mixture ingredients are:

2 cups finely chopped walnuts, almonds or pistachios
1 cup dry sweetener
1 tablespoon rosewater or cinnamon

Follow the instructions for the stuffing and baking of the date mamoul.

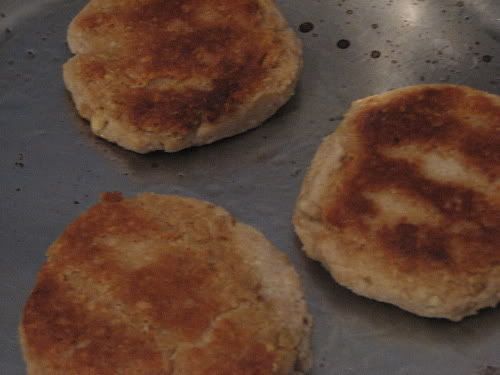
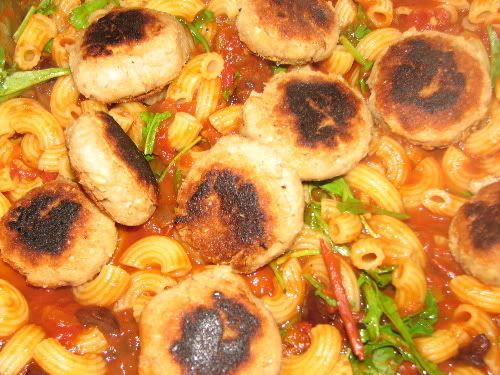
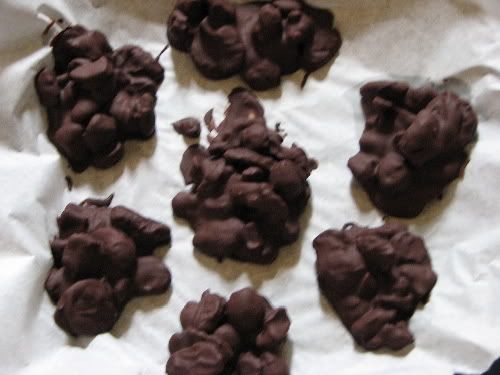
For my second batch of mamoul, I got a little excited with the shaping (I'm practising my tortellini shaping), and here's the results:


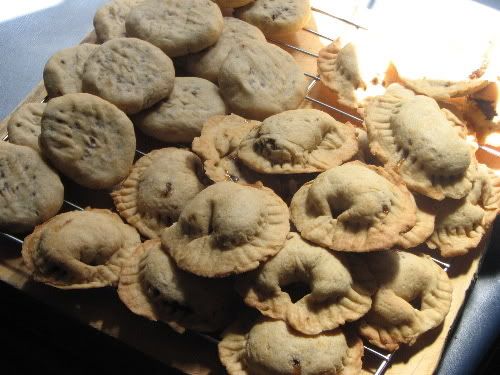
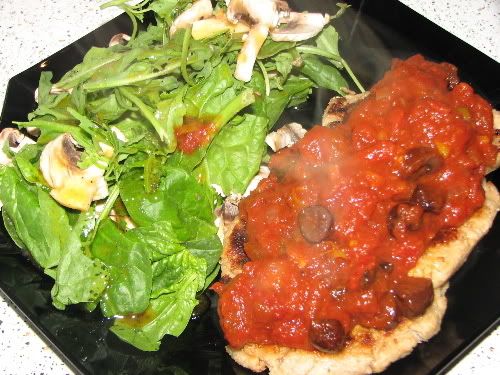
Serve with strong coffee at the end of a delicious Lebanese meal!!

Chocolate Mousse (or is it a truffle?)

I only really discovered the joys of chocolate mousse after becoming vegan – just one of those things that tasted far too…creamy and fatty and rich…when made with animal products.

Since then, I have made chocolate mousse occasionally – mostly as a special occasion dish. It’s so rich and nice (but light and not ill-feeling making) and especially easy to make, but it looks so darned impressive ;-)

I like to eat this on its’ own, or with a nice vanilla soy ice cream, or with fresh fruit. Or, you could make a lovely biscuit base (such as the one I use for Not!Cheesecake) and spread the mousse in it, and serve up a lovely mousse pie.

This time around, I made coconut chocolate mousse, which thickened up to almost truffle consistency in the fridge!! Reduce the amount of coconut if you decide to make the mousse – or increase it a little to make lovely firm truffles!!

Other flavours you could add – orange juice/Cointreau (perhaps use cocoa rather than chocolate in this case), or mint essence (mmm mint choc mousse) or none at all, because chocolate is lovely all on its own ;-)

Chocolate Coconut Mousse

Ingredients

1 x 300g block silken tofu, carefully drained
1 block vegan chocolate, melted
Liquid sweetener to taste (I used about 1/3 to to 1/2 cup vegan maple syrup)
1/2 to 1 cup shredded coconut

Method

Put the tofu into your trusted food processor (mine is beginning to die! I’m going to have invest in a hardy commercial grade one soon, methinks…), and whiz around until just beginning to get smooth. Pour in the slightly cooled melted chocolate, and process to combine thoroughly. Slowly add your liquid sweetener, stopping occasionally to taste. I don’t like my mousse too sweet, so you really need to find your own level here – it’s such a rich treat that the less sweet is better (plus, it means that you can serve it with much sweeter icecream and not feel sugar overloaded!!)

When the mousse is a lovely glossy smooth consistency, slowly add in your coconut – you can just stir it through, or you can combine it quickly in your food processor.

Chill until thickened, and serve.

Share and enjoy with someone you love!!

Sunday, January 28, 2007

Randomness

Couple of quick non-recipe related things:

1. In the change over to the new Blogger, I seem to have screwed up the comments section on some of my recent posts. Hopefully this is now rectified for every post from now on in - can't seem to fix it for the buggered-up posts, though. Technology makes ZB confused.

2. Just a couple of photos of foods I have been eating recently, that aren't really recipes:

My Sunday breakfast - sunflower seed sourdough toast with Nuttelex and tomato, and "dessert" toast with banana and my mother's homemade marmalade *drools* And, of course, a big Browncoat cup o' coffee with soymilk.


Seitan and salad sandwich - I've been topping my salad sandwiches with a dressing of flaxseed oil and either apple cider vinegar or umesu - quite a kick!!


Awesome vegan gyoza, made by a friend Jenwah - here are the stages of just stuffed, just made, and lovingly presented.


Another dinner party, another attempt at taking a good photo of my cheesecake. I'll get there eventually!!


I made some mint chocolates with my friend Neibi a couple of days ago, and had some melted chocolate left over, so made some teeny peanut butter cups.


And, finally, just a quick photo of my second attempt at felafel - better presentation, but the taste wasn't as brilliant. Hmmm, requires more work (oh no, not having to eat more felafel - how will I survive?!)


3. Just a quick note - I recently applied to a local community college to run vegan cookery classes. Am having a meeting tomorrow afternoon about it, so fingers crossed! Exciting, yet terrifying ;-)

Will post some more recipes when I've pulled together the bits of paper and various websites of inspiration that I've been using for the goodies I've cooked recently!!

Friday, January 19, 2007

TexMexMacnCasheez

This is one of those meals that you throw together, thinking: "Mmmmm, dodgy leftover meal. I'm never telling anyone about this gastronomic low point". And then you make it, and it's freaking awesome, and you know you're going to make it again, and you want to tell everyone about it.

So here 'tis.

TexMexMacnCasheez

Ingredients

1/2 batch spicy beans
double batch of Casheez Sauce
1/2 cup sundried tomatoes, sliced
1/2 to 1 cup mushrooms, sliced
1 clove garlic, minced
2 1/2 cups macoroni/shells/cute pasta shapes
Salad leaves
cucumber, sliced
Byron Bay Chilli Coriander Jalapeno Sauce
splash apple cider vinegar
flaxseed/linseed oil

Method

Put the water on to boil for the pasta. Add the pasta, and cook to packet directions until tender.

In a deep saucepan, make the Casheez Sauce (you could make a white sauce, but Casheez works so well in this recipe!!). When it's cooked, lower the heat and add the sundried tomatoes, mushrooms and spicy beans.

Stir through the pasta, and take off the heat.

Make your salad dressing by whisking together approximately equal splashes of the Coriander Jalapeno Sauce, vinegar and flaxseed oil until it is thickened and glossy.

Serve the TexMexMacnCasheez with a big mess o' salad leaves and sliced cucumber topped with the spicy salad dressing.

Try to stop eating it!! It's impossible!!

It’s not Risotto, it’s Quinoa-otto (??)

I’m limited in my rice intake, and one of the types of rice which I am not even allowed to look at sideways (curses!!) is Arborio (or risotto) rice. Which sucks, because I was well on my way to becoming a risotto queen (if I do say so myself).

I am experimenting with different grains to replicate that wonderful risotto experience, and most recently tried quinoa. The flavour was great, the quinoa cooked well in a risotto style, and I really enjoyed the end result. The only thing that really distinguished it from risotto (apart from, you know, not containing any rice) was that the creaminess of a really good risotto was not there – it was actually quite dry (comparatively).

I may sneak in some of my other risotto recipes in the future (roast garlic and pumpkin, tomato and mushroom, risotto balls…), but in the following recipe, substitute Arborio rice for the quinoa if you are lucky enough to be allowed to eat rice!!

This recipe was originally conceived by Varinth, so many props to him. It’s one of my favourite ways to have risotto now!

Balsamic Eggplant and Olive Quinoa-otto

Ingredients

1 ½ cups quinoa/Arborio rice (if you are using quinoa, remember to rinse it really well before cooking it)
2 medium eggplants, cubed
2 litres vegetable stock
2 cloves garlic, minced
½ cup kalamata olives, sliced
Balsamic vinegar – about 1/3 cup
Olive oil
Rocket
Additional olives

Method

Put the stock onto a low heat, and keep simmering.


Heat olive oil in a frying pan over a medium heat, and fry the eggplant until browned and soft. Drain on paper towel, and divide into thirds. Put two thirds into a bowl and pour the balsamic vinegar over to marinade. Leave the eggplant for about 20 minutes, stirring occasionally, until all the vinegar has been soaked up by the eggplant. Put the other third to the side.


Heat olive oil in a deep bottomed pan, and add the garlic. Stir quickly until fragrant, and then add the quinoa/Arborio rice. Combine quickly, and cook until the quinoa seems dry. Add two to three ladles worth of stock, and cook, stirring, until it has been absorbed. Add another two ladles worth of stock, and repeat.

Add the non-marinated third of the eggplant to the saucepan, and mix through.

Continue adding ladles worth of stock and stirring until it has been absorbed. Add most of the marinated eggplant to the saucepan, leaving behind a little for presentation later.

Continue adding ladles worth of stock and stirring until it has been absorbed. When the quinoa/Arborio rice is almost cooked, add the olives. Continue with stock/stirring until the quinoa/Arborio rice is completely cooked.

Cover, take off the heat and set to one side.

In a bowl, combine torn rocket leaves, the remaining eggplant and some olives, with a little splash of balsamic vinegar.

Serve the quinoa-otto topped with the rocket leaves mix.


Friday, January 12, 2007

Easy fun with puff pastry

It's not healthy, it's not low GI, but sometimes all you want is something wrapped in pastry...It's a whole experience.

I use Borg's puff pastry, because it is guarenteed vegan (don't you love when products actually have that written on them? Yay! Vegan-friendly companies!!)

The following amazingly stupendously simple recipe (which is great for any kind of party, be it cocktail party, kid's party, dinner party - and also makes a fun lunch with a big green salad) is stolen from my friend Neibi, and all props must go to her (and also blame, due to the fact that I'm now obsessed with making these!!)

Mini Vegan Sausage Rolls

Ingredients

1 packet (or more if you're catering for a big party) of vege sausages - I use sausages from the Sanitarium range (though be careful to check the ingredients, as some contain milk/eggs)
defrosted sheets of puff pasty - each sheet will cover four vege sausages

Method

Preheat oven to 180 degrees celcius.

Cut pastry sheet into quarters. Place vege sausages on the bottom of each quarter. Roll upwards until the pastry edges meet around the vege sausages.

To make "party sausage rolls" cut each pastry covered sausage into sixths.


Place sausage rolls, pastry overlap side up, on a greased baking tray and bake until the pastry is all puffed up, golden brown and crispy.

Serve hot, with sauce of choice.

I often have way too much fruit on my hands, because I love fruit and keep forgetting that I'm limited in my daily intake these days.

So, instead of letting the fruit rot and go straight onto the compost, I like to use it up in different ways. The following is one of the easiest!!

Easy Peasy Fruit Lattice Pie

Ingredients

Mixed fresh fruit, sliced (peaches, pears, apples, nectarines - or berries - or even bananas!)

lemon juice to taste

agave nectar to taste

2 sheets of puff pastry, thawed, with one sheet cut into 1cm wide strips

Method

Preheat oven to 180 degrees celcius.

Toss the fruit in the lemon juice and agave nectar, and set to one side for about 15 minutes, to allow the flavours to blend.

Line a greased pie tin with one sheet of puff pastry. Pour in the fruit, and top with the strips of puff pastry, overlapping them in a lattice style.

Alternatively, you can just top with a single sheet of puff pastry - remember to prick some holes in it to allow steam out!!

Put in the oven, and cook until the pastry on top is all puffed up, golden brown and crispy.

Serve on its own, or with vegan custard or icecream.


Tuesday, January 09, 2007

I Can't Believe It's Not Cheesecake! (Run, Fabio, Run!)

Mmmmm. Baked cheesecake. *drools* One of the great struggles I had with becoming vegan was the thought of not having this delight in my life. But, thanks to an inspirational recipe from (where is it from, kids? That’s right!) vegweb, by Amy, I found my cheesecake groove. I’ve adapted this recipe quite a lot, and found a really good standard recipe (at least I think it is!!)

The only issue I have with this cheesecake is that, whilst it is baked, and has the taste of baked cheesecake, the consistency is of a chilled cheesecake – quite soft and custardy. I don’t really mind, but over time I’m hoping to adapt this recipe further to get that baked consistency.

In the meantime, this is awesome – and relatively easy to make. It takes time, but it’s really worth it.

(My apologies for the quality of the photographs – it was New Year’s Eve, I was in a hurry to eat it, and the champagne I’d consumed probably didn’t help my photography skills!! I’ll post some more photographs the next time I make it!)

I Can’t Believe It’s Not Cheesecake!

Ingredients

Crust

1 and ¼ cups biscuit crumbs (I use McVitie's Digestives, because they're not very sweet)
1 - 2 tablespoons muscovado or other dry sweetener
1/4 cup melted Nuttelex

Cheesecake Batter

1 x 300g packet silken tofu, carefully drained
2 tubs Tofutti Better Than Cream Cheese
1/4 cup lemon/lime juice
1/2 cup applesauce
1/3 to 1/2 cup muscovado or other dry sweetener
2 tablespoons custard powder (I use Orgran Custard Mix [scroll down on the link])

Method

Crust

Preheat the oven to 180 degrees celcius.

In a food processor, grind the biscuits to form crumbs. Slowly add the sweetener and the melted Nuttelex, to form a crumbly mix that stays together when pressed between the fingers.

Press this mix into a greased springform pan, to form a crust along the bottom and up the sides. Put into the oven and bake for about 10 to 15 minutes. Take out of the oven and set aside to cool. Leave the oven on.


Cheesecake Batter

Put the Better Than Cream Cheese and the tofu into the food processor, and blend together. Add the juice, applesauce, and sweetener, and blend until well combined. Finally, add the custard powder and blend until very smooth.


Pour the batter into the cooled crust, and put in the preheated oven. Bake for about 45 to 50 minutes - make sure to turn it at least once to allow for even cooking. Turn off oven when the cheesecake is done, and leave the cheesecake in for another 15 minutes.

When done, the top will crack, and the batter will pull away from the sides. The centre will still be a little wobbly, but this will firm up when the cheesecake is cooled.

Allow the cheesecake to cool for about an hour at room temperature, and then refrigerate for at least three hours. Keep refrigerated.

The last time I made this, I served it drenched with a raspberry sauce.

Over the Top Raspberry Sauce

Ingredients

1 packet frozen raspberries
1 - 2 tablespoons agave nectar
1 cup mix of lemon and orange juice, and water
1 tablespoon arrowroot

Method

Stir the arrowroot and the 1 cup mix of liquid together and pour into a saucepan. Put the saucepan on a medium high heat and stir the mix constantly until it begins to thicken. Add the agave nectar and a quarter of the raspberries. Stir constantly until completely thickened. Add the remaining raspberries, stir through thoroughly, and then allow to cool.

When both the cheesecake and the sauce are cool, pour over the cheesecake. Leave for an hour in the refrigerator to allow the sauce to set slightly.

Warning: Will dribble everywhere!!


Baby loves to Salsa!

I first made this when I was making burritos and didn’t have any salsa to serve with the refried beans I was making. It can be served hot or cold, as a salsa on the side, or with pasta for a great quick meal.

Spicy Salsa

Ingredients

2 cloves garlic, minced
1 onion, chopped
1 TS tomato paste
Pickled chillies, cut roughly (to taste)
Equivalent amount of olives (I use kalamata olives, but green should be fine. Just don’t use Spanish!!), cut roughly
1 x 450g can of chopped tomatoes
Cumin to taste
Coriander to taste
Lemon juice to taste
Olive oil

Method

Heat the olive oil in a frying pan over medium heat. Add the garlic and onion, and fry until translucent and fragrant. Add the chillies and olives, and fry until fragrant. Add the spices and fry until everything starts to stick slightly, and then pour in half of the lemon juice to deglaze the pan.

Plop in the tomato paste and stir to mix thoroughly. Pour in the chopped tomatoes, ½ can of water, and the remainder of the lemon juice.

Cook slowly over a medium heat, stirring occasionally, until very thick. Use in small doses, as it is a very intensely flavoured salsa (especially if you put heaps of chillies in it!!)

Na-Na-Na-Na-Na-Na-Na-Na-Protein Patties!! [/original Batman theme]

I came up with these one day when I had tofu marinating in the fridge, and couldn’t decide what to do with it, and really wanted a burger or something equivalent to have with a nice sauce and salad. I’m always aware that I need to up my protein intake as part of my low GI diet, so it’s always good to find something else to add to my list of protein-y things that are easy to make!!

I was well chuffed, because one of my main problems with making vegan patties is getting them the right consistency and getting the damn things to stick without eggs! I persist, because it’s one my holy cooking grails – I want something that’s not going to fall apart when I cook it, and isn’t going to taste too dry.

These are not as highly flavoured as some of my meals, but the salsa with them takes care of the uber flavour kick!!

Protein Patties

Ingredients

1 can cannelini (or any type) beans
1 and a ½ cups raw cashews (or raw almonds)
About 150g extra firm tofu
Garlic powder to taste
Onion powder to taste
2 TS sauce – plum, soy, vegan oyster
Any dry flavourings you want (to taste) – make it a little more Meditteranean with cumin/coriander, make it a little Italian with oregano/thyme, make it more Asian with chilli/lemongrass…
½ - ¾ cup rolled oats or barley
Oil for frying

Method

Put the cashews into a food processor, and process until broken up. Add the tofu, and process until well combined. Add the beans, garlic and onion powders and any other dry flavourings, and process until smooth. Pour in enough of the sauce to make the mix moist but not sticky. Add the oats/barley and process until the oats/barley is well distributed throughout the mix. Add a little more sauce if the mixture is too dry.

The mix should be moist but not sticky. Form into patties and leave in the fridge to firm up for at least an hour.


To cook, heat a little oil in a frying pan over a medium heat. Place the patties in the frying pan, and cook until browned on both sides. You should be able to move them around and flip them a couple of times, but don’t get too enthusiastic about it!

Serve with spicy salsa and greens,


or, make the patties into meatball size,


and serve with pasta and thick tomato sauce as vegan pasta and meatballs.


Spicy Plum Sauce

I love plum sauce - you get it less and less in restaurants these days, and it's always too damn sweet for my liking. I like it spicy and vinegary. So, when I was making some salt and pepper eggplant and tofu, I thought that the best thing with them would be plum sauce. And here's the recipe I made up!

Spicy Plum Sauce

Ingredients

Ten plums, seeded and sliced
3 cloves of garlic, minced
Spring onion, equivalent to garlic
Optional – fresh chilli (half the amount of garlic), minced
1 tablespoon Vegan chinese bbq sauce
1 tablespoon Vegan oyster sauce (more to taste)
1 tablespoon Soy sauce
1/3 to ½ cup Vinegar (apple cider works really well)
Water
Vegetable oil

Method

Heat a splash of oil in a saucepan over a medium heat. Add the garlic and spring onion (and chilli, if using) to the oil, and cook until fragrant. Add the plums, and stir thoroughly. Add the BBQ, vegan oyster and soy sauces, and stir until well mixed.

Pour in the vinegar, and add water to almost cover the plums. Cook over a medium heat, stirring occasionally, until the plums have broken down, and the sauce is quite thick. You may need to add a little more water and vinegar during the cooking process.

When cooked, take off the heat and allow to cool a little. Slowly push the sauce through a sieve with a wooden spoon, making a smooth and thick end result. Allow to cool completely.

Tastes amazing with the salt and pepper eggplant.

You can also make this with apricots rather than plums – or a mix of them!

Salt and Pepper Things...

This was part of a summer-y Asian inspired meal I put together recently - including sang choi bow and beautiful spicy plum sauce.

Salt and Pepper Things

Ingredients

Extra firm tofu, frozen, thawed, defrosted and pressed – cut into 1cm thick triangles
Eggplant, cut into 1cm square logs
Cornflour
Seasoning Salt to taste (I use Herbamare)
White Pepper to taste
Vegetable oil for deep frying

Method

This is an incredibly simple yet incredibly tasty recipe.

Combine the cornflour, salt and pepper. I use white pepper because it’s got a lovely colour, it’s very strongly flavoured, and it has the right consistency to mix into the cornflour.

Heat the oil in a deep saucepan over a medium high heat.

Dry the tofu and eggplant. Using a sieve, dust the individual pieces with the cornflour mix – leave the eggplants until last, as the salt in the cornflour can cause moisture to leak from the eggplants, making everything a bit gloopy.

You may need to do a couple of dustings, until the tofu and eggplant pieces are thoroughly covered. Shake off excess cornflour (you should be able to see through it to the surface of the tofu and eggplant) and drop into the oil.

Deep fry until golden and crisp, and put onto paper towels to drain off the excess oil.

Serve as part of rice paper rolls, or with lettuce leaves, or with steamed rice and plum sauce.

A great summer meal - sang choi bow

I love sang choi bow - it's tasty, healthy, and fun to eat. I developed a vegan version of it after having it at one of my local awesome vegan restaurants.

It's a great summer dish - filling but not too hot. I like it as a main, but you can have it as an entree as part of an Asian inspired meal.

Sang choi bow

Ingredients

Iceberg lettuce
3 cloves garlic, minced
Equivalent amount of minced ginger
Equivalent amount of finely chopped spring onion (white part only)
Fresh or dried chilli, minced (amount depends upon how hot you want the dish – I use an approximate equivalent to the amount of garlic)
2 cups dry TVP/soy mince
1 cup carrots, diced
1 cup beans, diced
1 cup mushrooms, diced
½ cup water chestnuts, chopped
1 TS palm sugar (or brown sugar or other sweetener, dry or liquid)
1/3 cup soy sauce (more to taste)
Stock (about 1 litre, maybe more)
Vegetable/canola oil (olive oil is a little strongly flavoured for this dish)
Optional – hoi sin sauce, vegan oyster sauce

Method

Soak the dry TVP/soy mince in hot water, as per instructions on packet, until all the water has been absorbed.


Heat oil in a wok or frying pan over a medium heat. Add garlic, ginger, spring onion and chilli, and stir fry until very fragrant. Add the vegetables, and the rehydrated soy mince, and stir to combine thoroughly. Add the palm sugar, and stir until it has melted into the mix. Pour in the soy sauce, and mix thoroughly. If using additional sauces, such as hoi sin or vegan oyster sauce, add at this point.

Pour in the stock to completely cover the TVP/soy mince mix. You may need more than a litre. I often use a vegan chicken or vegan beef stock here, to flavour the TVP/soy mince a little more.

Cook over a medium heat, stirring occasionally, until the stock has been completely absorbed.

Whilst the TVP/soy mince mix is cooking, carefully pull leaves off the iceberg lettuce to form “cups”.

To serve, put a couple of spoons of the TVP/soy mince mix into the lettuce cup, and roll the lettuce carefully around the mix. Eat amongst friends who don’t mind getting messy!!


Sunday, January 07, 2007

Not so much the crazed chocolate insanity, but still...sweeties!!

'kay, these following recipes were my two "healthy" additions to the chocolates I gave everyone for Xmas. I love both of these very much (in fact, the apricot/coconut balls are my favourites of anything ever!!), and they're really simple...

...if you have a food processor. Have I mentioned recently my increasing reliance upon my food processor?

Halva is a great sweet - rich and creamy and exotic tasting. I've always loved sesame halva. The following recipe for Halva Balls (via vegweb, submitted by Veagan23) is a tasty and very rich variation on the halva I grew up with.

Halva Balls

Ingredients

1/2 cup raisins
1/2 cup dates
1/2 cup tahini
Optional - sesame seeds/icing sugar/cocoa to coat

Method

If using dried dates, place in a steamer basket over boiling water until soft. Allow to cool.

Place the raisins and dates together in the food processor, and blend quickly to combine. Pour in the tahini and process until a thick paste has been formed.

Pour onto a plate in a 1 inch thick layer, and allow to cool.

Use either a teaspoon or your hands to form balls. At this point, you can coat in sesame seeds, or dust with cocoa or icing sugar.

Keep chilled.


Apricots are a great source of beta carotene (and thus Vitamin A) and iron. Plus, bonus, yummy!! The following really ridiculously extremely simple recipe [/Zoolander] from cooks.com is easy to make and produces that nectar of my childhood:

Apricot Coconut Balls

Ingredients

1 cup dried apricots
1 and a 1/2 cups shredded coconut
1 - 2 tablespoons citrus juice (lemon/lime/orange/grapefruit)
Additional 1/2 cup coconut
Optional - confectioner's/icing sugar

Method

Place the dried apricots in a steaming basket over boiling water until soft and plump. Set aside to cool.

Put the additional 1/2 cup coconut in food processor, and process until powdery. Put to one side.

Put apricots and citrus juice in food processor, and blend to combine. Add the coconut, and process until the mixture is firm (if the mixture does not get firm enough to form into balls, or remains sticky, add a little confectioner's/icing sugar or more coconut to firm it up).

Form into small balls, and roll in the powdered coconut. Alternatively, you can dust them with confectioner's/icing sugar. Allow to dry at room temperature for at least 4 hours.

Saturday, January 06, 2007

Crazed Chocolate Insanity Part 4

Making the following recipe was so much fun - it was like a mad science experiment that resulted in sugary goodness!

I'm talking about making "honeycomb" - though, not so much honeycomb as aerated toffee - for homemade Crunchies (or Violet Crumbles, if you will). I got the secret from veganfamily.co.uk.

This is an incredibly dangerous recipe, as it involves boiling sugar, so it's something to do away from kids, methinks.

You don't need a sugar thermometer for this recipe, but if you've got one, that's always helpful!

Honeycomb

Ingredients

460g sugar (I used brown sugar for a slightly earthier taste)
1 cup water
2 teaspoons bicarbonate soda
Chocolate to be melted

Method

Grease a tin thoroughly.

Place the sugar and water in a deep pan (it must be deep, as the mixture will expand greatly when the bicarb is added), and mix well using a wooden spoon (do not use a metal spoon as it will heat up). Place over high heat and bring to the boil. Boil for about 20 - 30 minutes, until the mixture hits the hard crack stage. You can test this either by using a sugar thermometer (hard crack stage is 146-154°C) or by using a cup of iced water. Drop a little of the sugar into the water - when it forms a crisp solid drop and you can crack it satisfyingly between your fingers, it's ready.

Remove the sugar from the heat, and then sprinkle in the two teaspoons of bicarbonate. Stir whilst adding the bicarb to ensure that there are no lumps, and that all the sugar reacts. It will expand enormously.


Pour mixture into the greased tin, and allow to cool to room temperature (I used a metal tin, and it took about an hour to cool). Place in either the fridge or the freezer to completely cool.

Use a sharp knife to slice into sections - you will find that there is shattering and crumbs are created.


Melt the chocolate over a double boiler and allow to cool slightly. Dip the honeycomb quickly into the chocolate, remove excess chocolate, and cool either in the fridge or freezer until the chocolate is firm.

Crazed Chocolate Insanity Part 3

For some bizarre reason, ever since I've become vegan I have been obsessed with finding a way to experience peppermint patties/after dinner mints/mint slices again. I wasn't that interested in them when not vegan, so I don't really know what that's all about.

Anyway, I found the most amazing fondant recipe on vegweb, and I am now forever grateful to the awesome Earthchild for creating the York-A-Like Peppermint Patties recipe. What's great about it is that not only can you make peppermint patties to your heart's content, but you can also experiment with the flavours and textures successfully, because the recipe is so simple!!

Warning, though, this is a sugar blast of doom, and really should be made and consumed in great moderation.

Flavoured Fondant

Ingredients

1/3 cup Karo corn syrup (which you can get, bizarrely enough, from health food stores)
1/4 cup Nuttelex (or other vegan "buttery" margarine)
4 and 3/4 cups confectioner's/powdered/icing sugar
peppermint oil/extract (or other flavours, such as strawberry/orange/coconut) to taste - about 2 to 3 teaspoons worth
Chocolate to be melted (amount depends upon how much fondant you've made!

Method

Again, the food processor of extreme hardiness is required. This mixture gets really stiff and forms a strong ball, which can make food processors unhappy (I know mine started to whine after the third batch!!)

Pour the corn syrup into the food processor, and add the margarine and flavour oil/extract. Whip until well combined.

Slowly (cup by cup) add the sugar (I poured it in through the chute of the lid). Occasionally turn the mixer off and push the sugar mixture around in the bowl - as it gets more firm the sugar you're pouring in will have difficulty mixing in.

When all the sugar has been added, you will have a firm, almost "dry", bright white ball. When you press a finger into the ball, it should keep the indentation.

Note: I made coconut bars, and added a cup of shredded coconut to the mixture with no loss of consistency, and with the added bonus of coconutty goodness!

For peppermint patties, I like to divide the mixture into at least two lots, and roll them into long sausages (about 1 inch wide) in grease proof paper. This makes it easier to form the fondant into rounds.

For other flavours, I like to place the mix onto grease proof paper, shape into a 1 inch high rectangle, and then place another piece of grease proof paper over the top. I then carefully run a rolling pin over the top to even out the mixture.

Place the mixture in the fridge to really firm up - at least an hour. When firm, take out the peppermint rolls, and slice into 1cm slices. Quickly shape the slices into rounds. The mixture will become sticky as it warms up, so try and keep most of it in the fridge.

For the other flavours, use a sharp knife to slice the rectangles into the desired shapes (I used triangles for strawberry, squares for orange, and logs for coconut).

This fondant is extremely rich, so keep the shapes small.

And then comes the chocolate dipping fun!!

Melt the chocolate over a double boiler, and allow to cool slightly.

Using a toothpick, spear your fondant shape, and quickly drop into the chocolate. Use a plastic spatula to cover the fondant in chocolate. Using the toothpick again, spear the fondant and remove from the chocolate, and quickly remove the excess chocolate. The fondant will begin to melt with the heat of the chocolate, so be as quick as possible. Drop the chocolate covered fondant onto grease proof paper.

I cool these by placing them directly into the freezer until the chocolate is solid, and then store them in the fridge.


Crazed Chocolate Insanity Part 2

The following recipe is uber simple, and produces the tastiest and most more-ish of the chocolates I made over Xmas (if you like fruit and nuts, that is. If you don't, then maybe not so tasty...)

This fabulous recipe for fruit and nut clusters comes from vegweb (titled there Super Duper Crunchy Chocolate Clusters) and was submitted by Libby Lyski.

Fabby Fruit and Nut Clusters

Ingredients

1 cup organic raw cashews, broken up
1 cup organic raw hazelnuts
1 cup organic dried muscatels
1 1/2 blocks of Lindt 70% cocoa chocolate

Method

Melt the chocolate in a metal bowl over boiling water. Add the nuts and muscatels and stir vigourously until the chocolate and nuts and fruits are thoroughly mixed.

Use two spoons to drop clusters onto grease proof paper.

You can then put the clusters into the fridge to harden, but I tend to do a quick version of this by placing them in the freezer until the chocolate has hardened again (about 5 minutes, if that), and then putting them in the fridge to keep.

Easy as, and really really tasty!!

Wednesday, January 03, 2007

Crazed Chocolate Insanity Part 1

So, for the festive season, I decided to trawl the internets for recipes, and make some vegan chocolate goodies as gifts. This led to my spinning around on a sugar and caffeine high for about two weeks, but I'm feeling better now *twitch*

None of these are my original recipes, though I did adapt a couple. I had a great time making the chocolates, and it was lovely that everyone enjoyed them as thoroughly as they appeared to!! My acknowledgement must, of course, go out to all of those fabby vegan folks wot came up with these recipes in the first place!

Okay, here we goes!! Starting with my favourite, Chocolate Truffles (*drools*) The original recipe came from vegweb, submitted by katkarma.

Chocolate Truffles

Ingredients

2 tubs Tofutti Better Than Cream Cheese (this is my favoured faux cream cheese, but there are others - by Soy King, I think)
2 cups Lindt 70% cocoa chocolate, broken up (I love this chocolate, it's so smooth and it's readily available in supermarkets. But again, any vegan chocolate is good!)
3 cups confectioner's/powdered/icing sugar
Optional dipping ingredients - melted chocolate, cocoa, chopped nuts, etc
Optional flavouring - hazelnut/coffee/chocolate liquer

Method

You need a good food processor for this, as the mixture gets very thick.

Process the Better Than Cream Cheese until smooth, and slowly add the 3 cups of confectioner's sugar. Melt the chocolate - I like to use a metal bowl over a saucepan of boiling water. This ensures that the chocolate won't burn.

Pour the chocolate into the food processor with the cream cheese/sugar mix, and blend until smooth and thoroughly combined. At this point you could divide the mix and then add flavouring to the batches. I think it tastes just dandy as is, though!

Spread the mixture about an inch thick onto a plate, cover and cool until fairly solid.

Use either two teaspoons or your hands to mould the mixture into balls - you could put whole hazelnuts in the centre for added oomph.

I dusted mine with cocoa, but you can also carefully coat them in melted chocolate for a really intense flavour experience!! Or roll them in chopped nuts, or simply serve as is.

These must be kept chilled.